All Lower Quarter

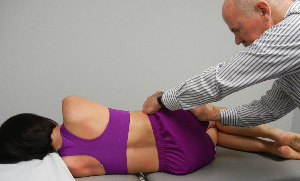
Pelvic Clock Test
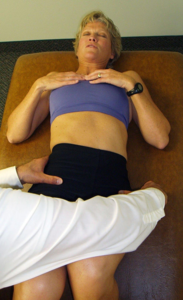
How to Perform

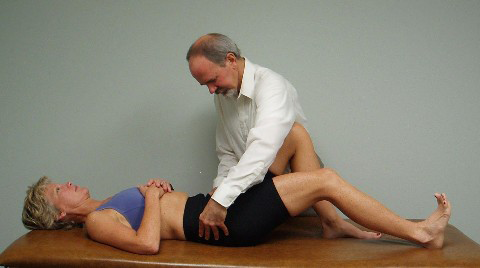
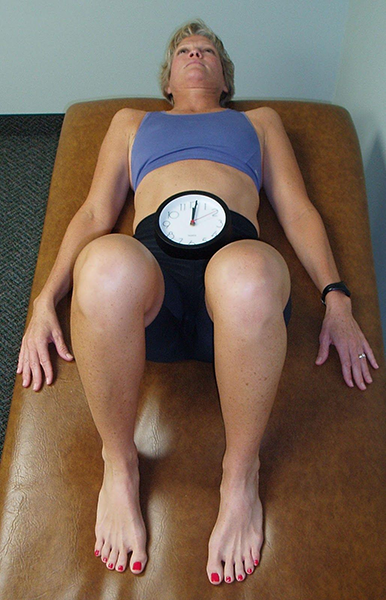
Lying supine with the hips and knees flexed, feet flat on the floor, with the knees and feet positioned hip width apart. Ask the patient to bridge up and then come back down to the table before they begin the movement test. Instruct the patient to visualize that they are lying on the face of a clock with 12 0’clock towards the head and 6 o’clock towards the feet. Ask the patient to roll the pelvis up towards 12 o’clock (posterior pelvic tilt) then down towards 6 o’clock (anterior tilt). The therapist places their thumbs either on the superior or preferably inferior slope of the ASISs to note their symmetry or asymmetry in the frontal plane before the patient begins to move. As the patient rolls the pelvis towards 12 o’clock the thumbs follow the ASISs as they move superiorly noting any asymmetry in movement, or if asymmetry was already present to begin with, does the asymmetry of the ASISs change when moving towards 12 o’clock becoming either more or less symmetrical. The patient then rolls the pelvis towards 6 o’clock with the therapist’s thumbs following the ASISs as they move inferiorly observing for any asymmetry of movement and also recording whether any previously noted asymmetry changes as the pelvis moves toward 6 o’clock. Ideally no asymmetry is noted in the frontal plane when initially palpating at the ASISs before the movement begins and that the ASISs remain symmetrical/level throughout the full range of movement between 12 and 6 o’clock.
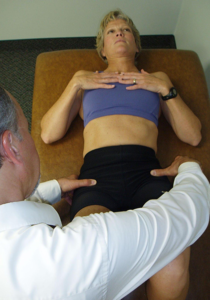
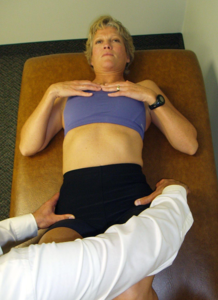
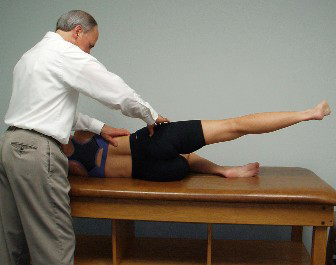
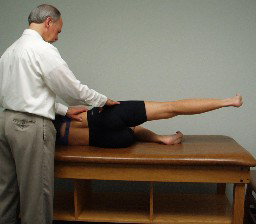
Notice that when this patient rotates the pelvis upwards toward 12 o’clock that the L ASIS moves cephalad much further than the R ASIS, pictured on the left, and when rotating the pelvis towards 6 o’clock the R ASIS moves much further caudally than the L ASIS, pictured on the right. This patient demonstrates significant asymmetry and dysfunction in sagittal plane mobility and motor control.
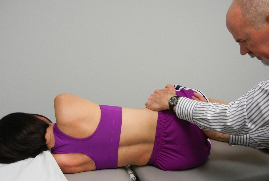
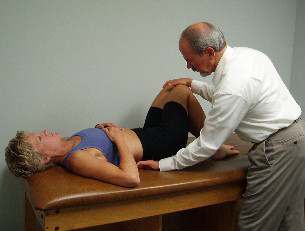
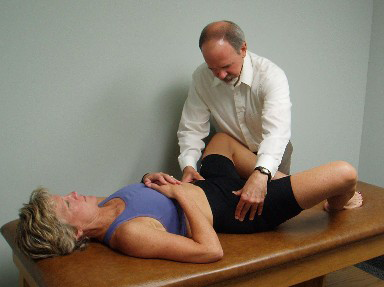
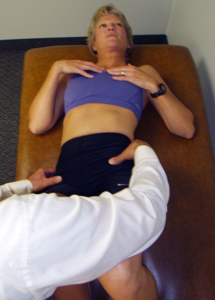
After assessing 12 and 6 o’clock movements the therapist maintains contact with the ASISs and instructs the patient to lift up the left side of the pelvis and rotate the pelvis towards 9 o’clock then lift up the right side of the pelvis and rotate towards 3 o’clock. Normally the ASISs should remain level in the frontal plane as the patient rotates the pelvis in the transverse plane.
Monitoring ASISs with 9 O’Clock and 3 O’Clock: Notice hip hiking on the left when rotating towards 9 o’clock and caudal movement of the R ASIS when rotating towards 3 o’clock.
This patient also demonstrates significant asymmetry and dysfunction in transverse plane mobility and motor control.
After assessing 12 to 6 and 3 to 9 pelvic clocks the therapist instructs the patient to attempt to rotate around the clock as though rolling around the rim of a bowl, moving both clockwise and counterclockwise with the patient attempting to touch every number on the clock. The therapist keeps their hands on the patient’s pelvis to feel as well as observe if the patient can touch each number on the clock or do they skip or have difficulty touching any number on the clock.
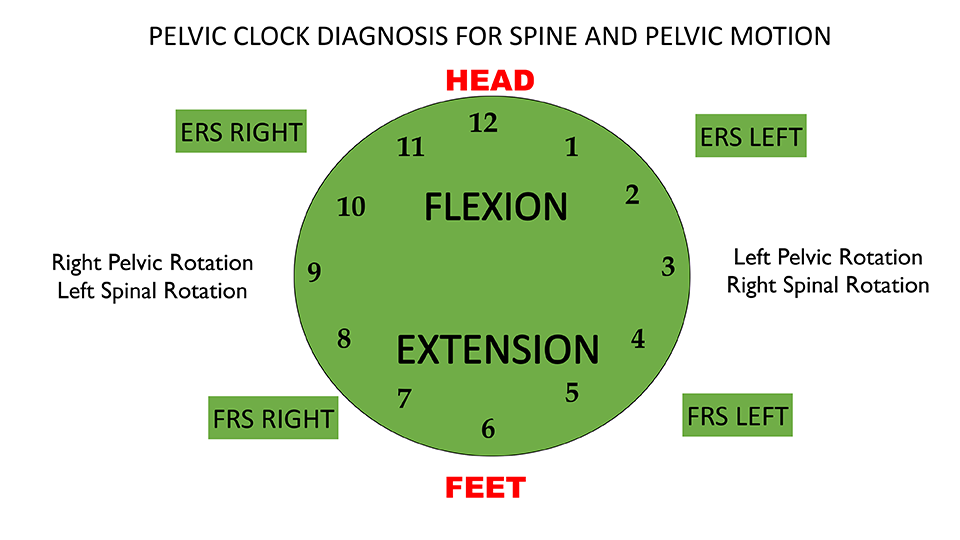
Full circle pelvic clocks can be used to reliably diagnose lumbar spine non-neutral dysfunctions by palpating the ASISs and observing if the patient has difficulty moving into any of the four quadrants when performing the clock. For example, limited movements in the lower quadrants below 3 and 9 indicate that an FRS dysfunction is present anywhere from T12 to L5. Limited movements in the upper quadrants above 3 and 9 indicate that an ERS dysfunction is present anywhere from T12 to L5. When there is a non-neutral dysfunction present anywhere from T12 to L5 the patient will not be able to perform a symmetrical pelvic clock and cut off that quadrant, ie., with an FRS R the patient will not be able to move towards 7 or 8 o’clock, with an ERS L the patient will not be able to move towards 1 or 2 o’clock. Refer to the picture above.


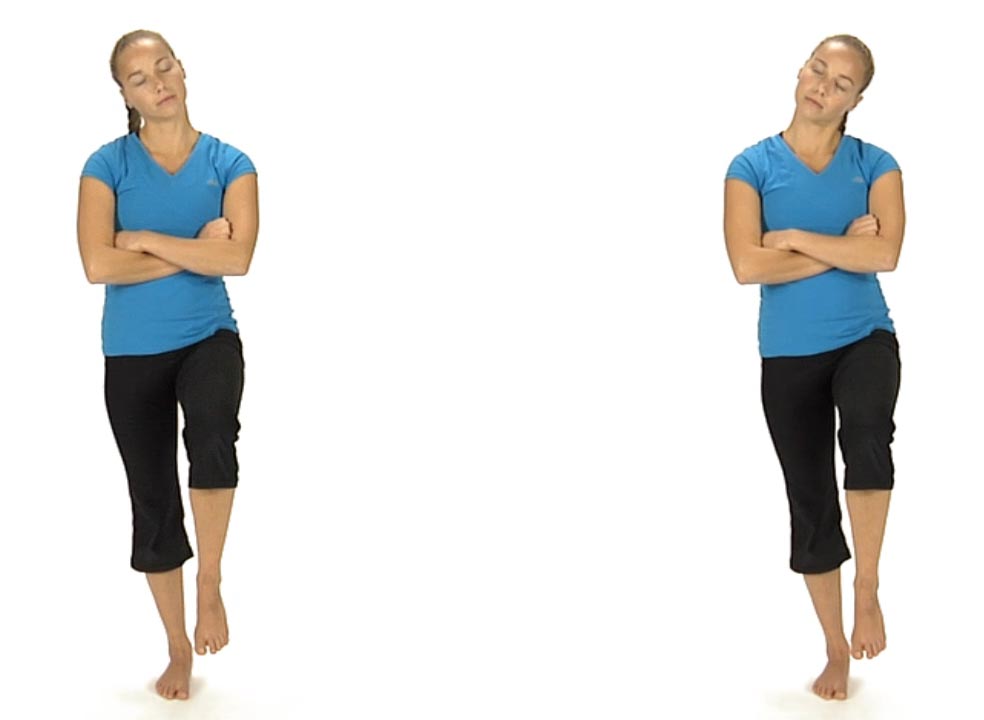
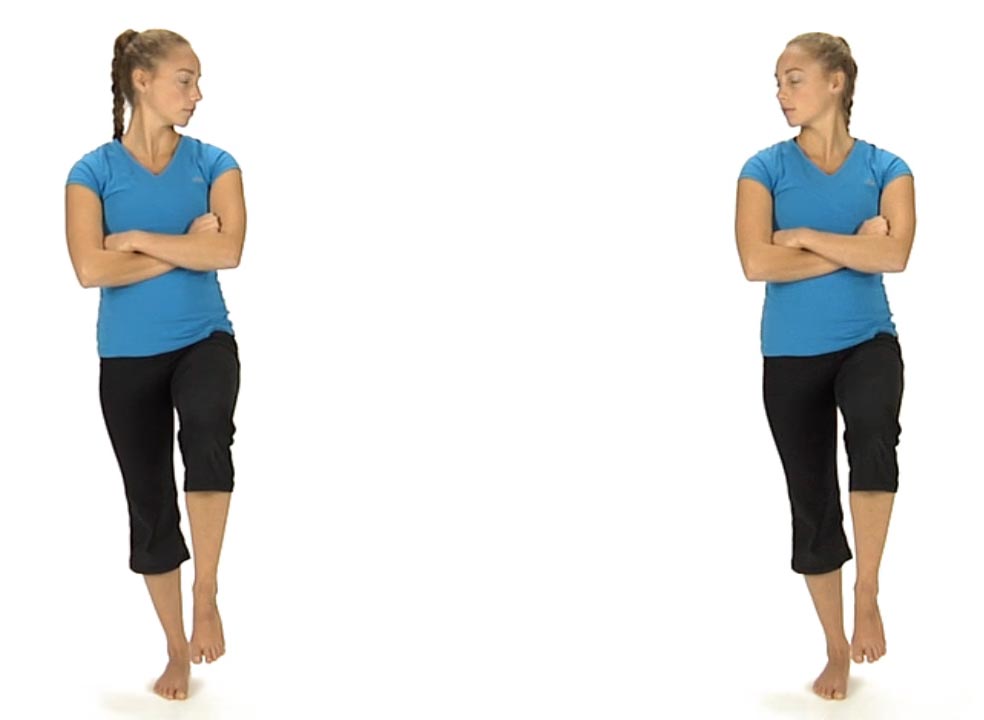
One Leg, Eyes Closed, Arms Crossed, Head Tilt, and Rotation
in 1 Sensorimotor Imbalances, 2 Movement Tests Lower Quarter, 5 Home Exercise Strategy, Active Trunk Rotation, All Home Exercises, All Lower Quarter, All Sensorimotor Imbalances, Hip ABD Firing Pattern, Hip EXT Firing Pattern, Pelvic Clocks, Rolling, Sensorimotor, Supine Curl Up, Supine Heel slide, Supine Hip ABD and ER