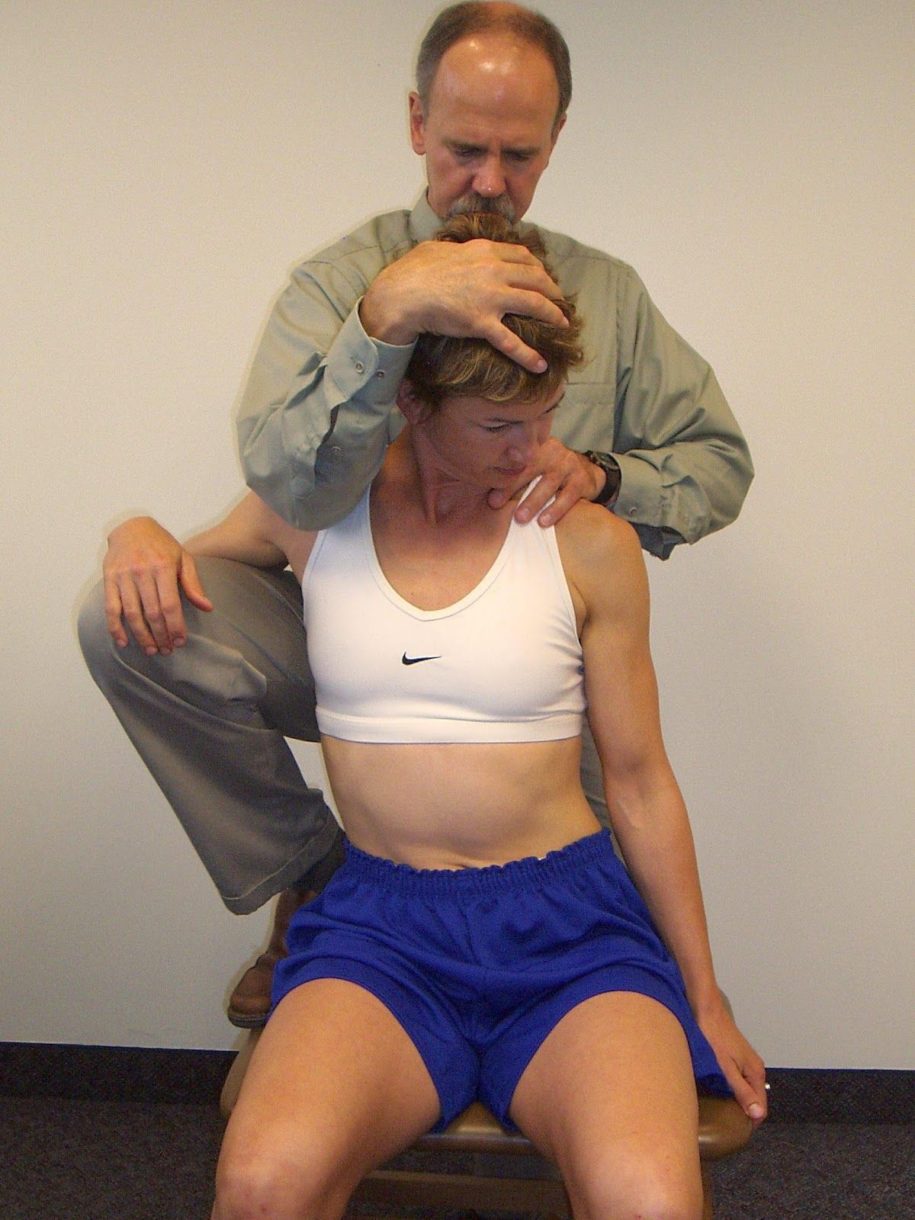
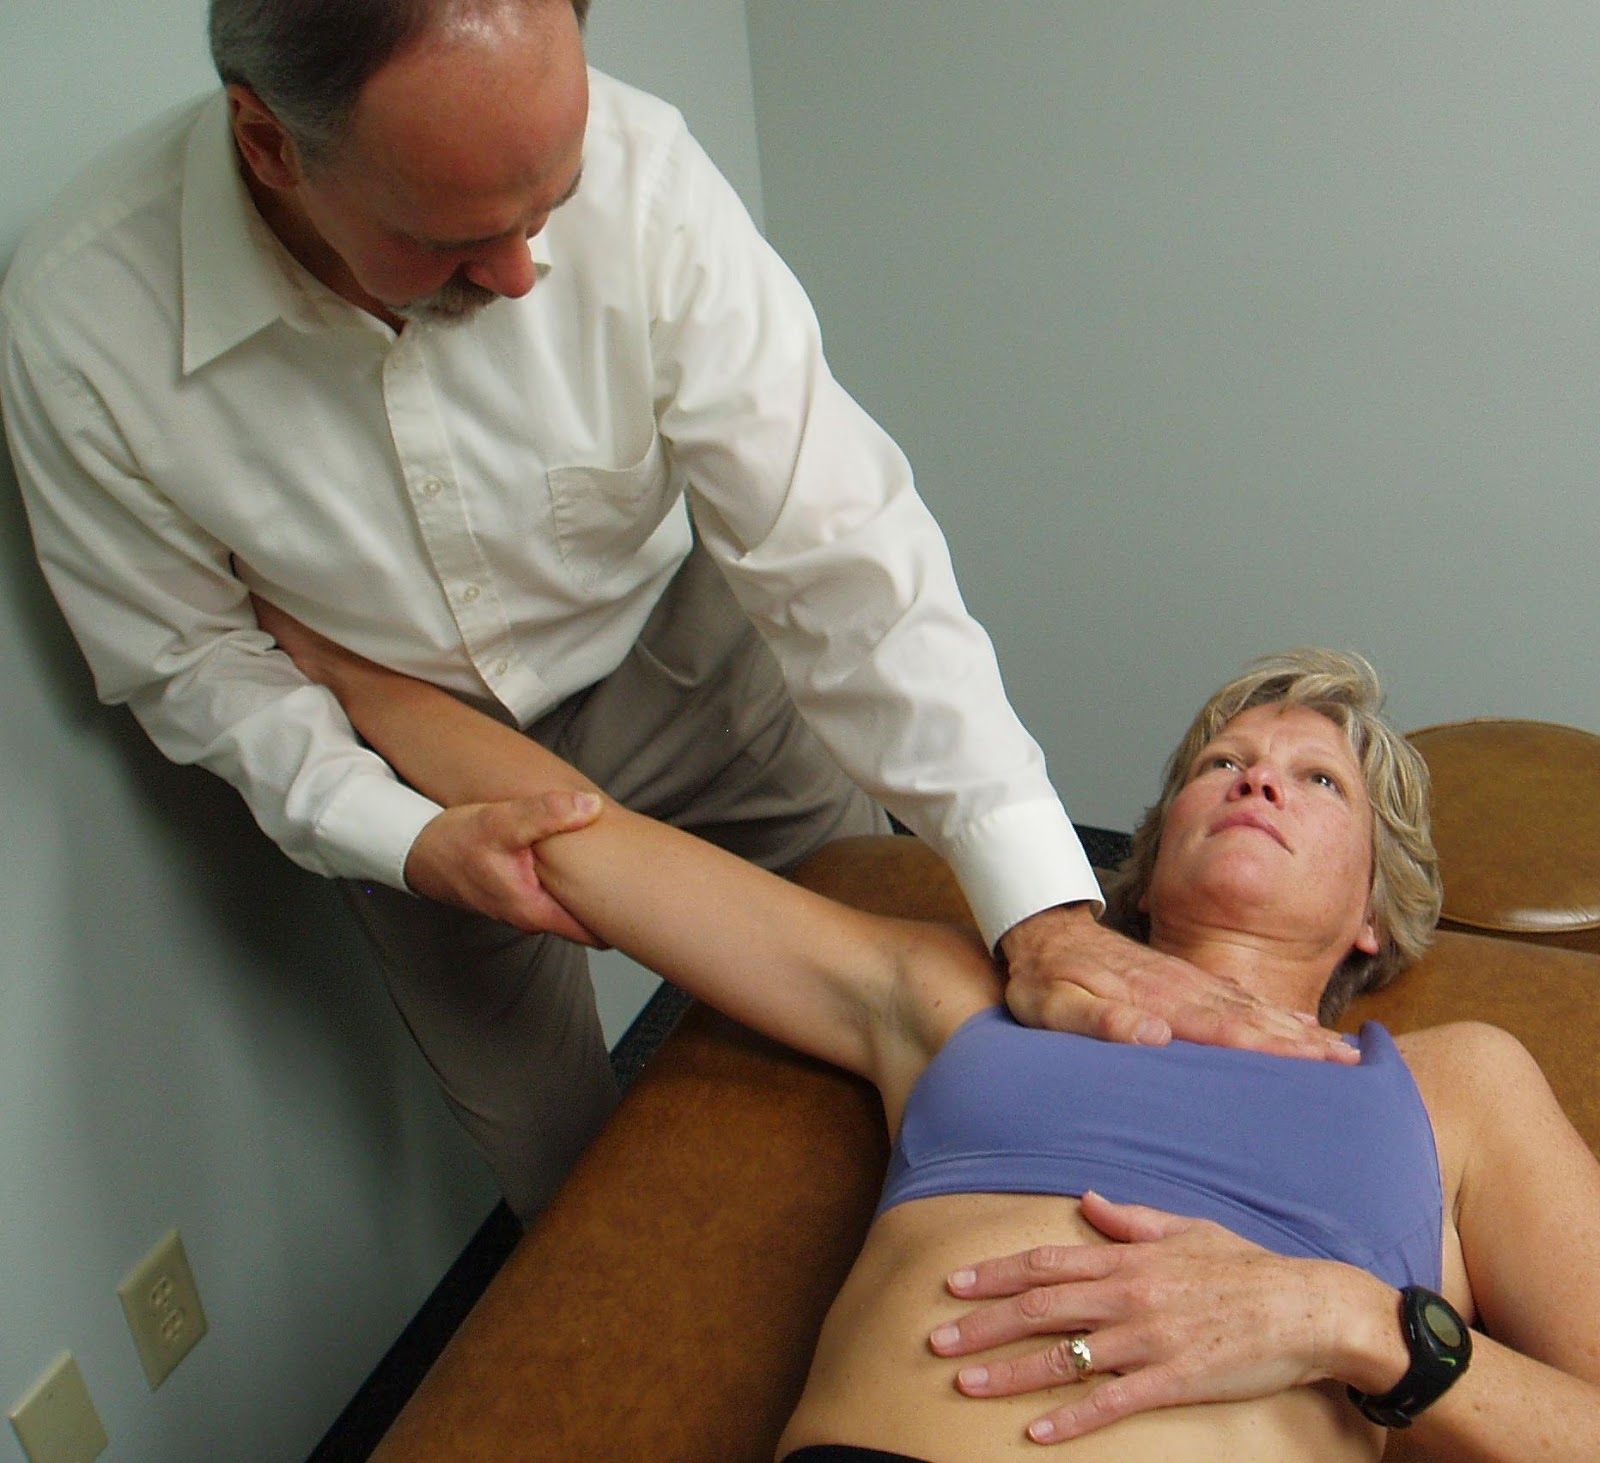
Muscle Energy Technique for ERS Dysfunctions of the Upper Thoracic Spine
For an ERS R from C7 to T5:
Patient places their R arm on your R leg with their whole arm resting and supported on your R thigh.
Place your R hand gently on top of their head and your L thumb on the L side of the interspinous space of the dysfunctional segment to monitor the motion barriers.
The patient is initially sitting in a slumped position, but with their head up. Ask the patient to sit up tall from below up by pushing their belly forward until you feel motion at your palpating L thumb.
Then with your R hand move the patient’s head from an extended position into flexion introducing flexion from above down to your palpating L thumb so that you create an apex for flexion at the dysfunctional segment.
L side bending is then introduced by translating your R leg to the R to create an apex for L side bending at your palpating L thumb.
The therapist then adds L rotation thru the head from above down to the dysfunctional segment making sure to go to just the feather edge and not beyond the motion barrier.
The patient is instructed to gently side bend their head to the R or pull their R arm down on your leg for 5-7 seconds.
When the patient relaxes you introduce additional L side bending to the new motion barrier by translating your R leg further to the R.
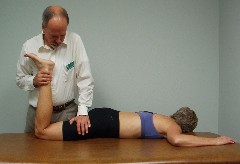
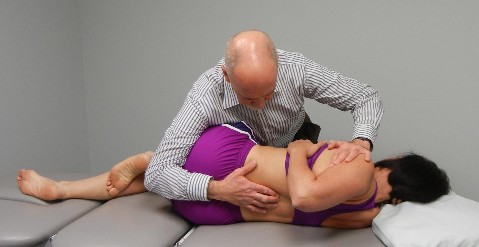
Manual Therapy to Address Pectoralis Minor Hypertonicity
Note that applying AP glides to the Sternochondral Joints in side lying from T3-5, which helps to diminish tone in the pectoralis minor, should precede manual stretching of this muscle.
Manual Stretching of the Pectoralis Minor:
The therapist’s left hand is placed over the 3-5th ribs to stabilize the origin of the pec minor.
The patient’s right arm is taken into horizontal abduction with varying amounts of flexion depending on the direction of greatest restriction.
The stretch is applied by tractioning the patient’s R arm longitudinally as the arm is taken into further horizontal abduction.
The stretch is held for 30 seconds and repeated 2-3 times.
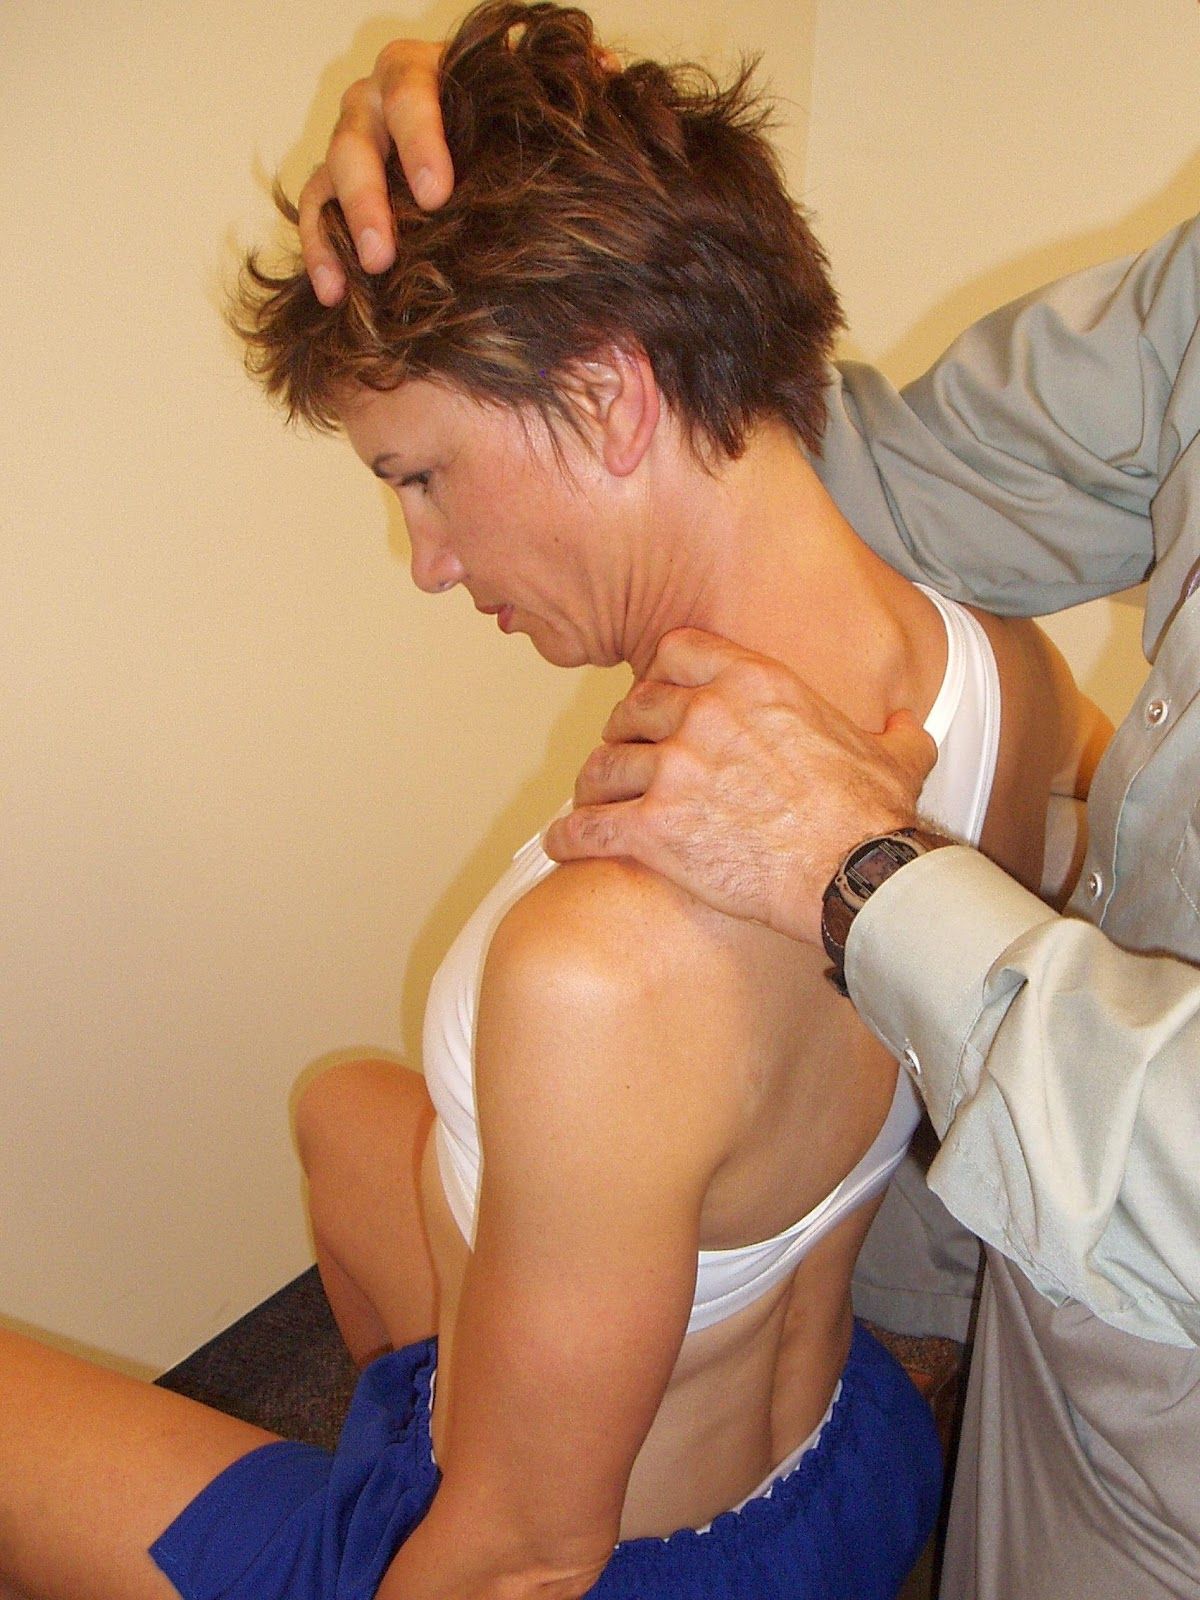
Muscle Energy Technique for ERS Dysfunctions of the Upper Thoracic Spine
For an ERS R from C7 to T5:
Patient places their R arm on your R leg with their whole arm resting and supported on your R thigh.
Place your R hand gently on top of their head and your L thumb on the L side of the interspinous space of the dysfunctional segment to monitor the motion barriers.
The patient is initially sitting in a slumped position, but with their head up. Ask the patient to sit up tall from below up by pushing their belly forward until you feel motion at your palpating L thumb.
Then with your R hand move the patient’s head from an extended position into flexion introducing flexion from above down to your palpating L thumb so that you create an apex for flexion at the dysfunctional segment.
L side bending is then introduced by translating your R leg to the R to create an apex for L side bending at your palpating L thumb.
The therapist then adds L rotation thru the head from above down to the dysfunctional segment making sure to go to just the feather edge and not beyond the motion barrier.
The patient is instructed to gently side bend their head to the R or pull their R arm down on your leg for 5-7 seconds.
When the patient relaxes you introduce additional L side bending to the new motion barrier by translating your R leg further to the R.
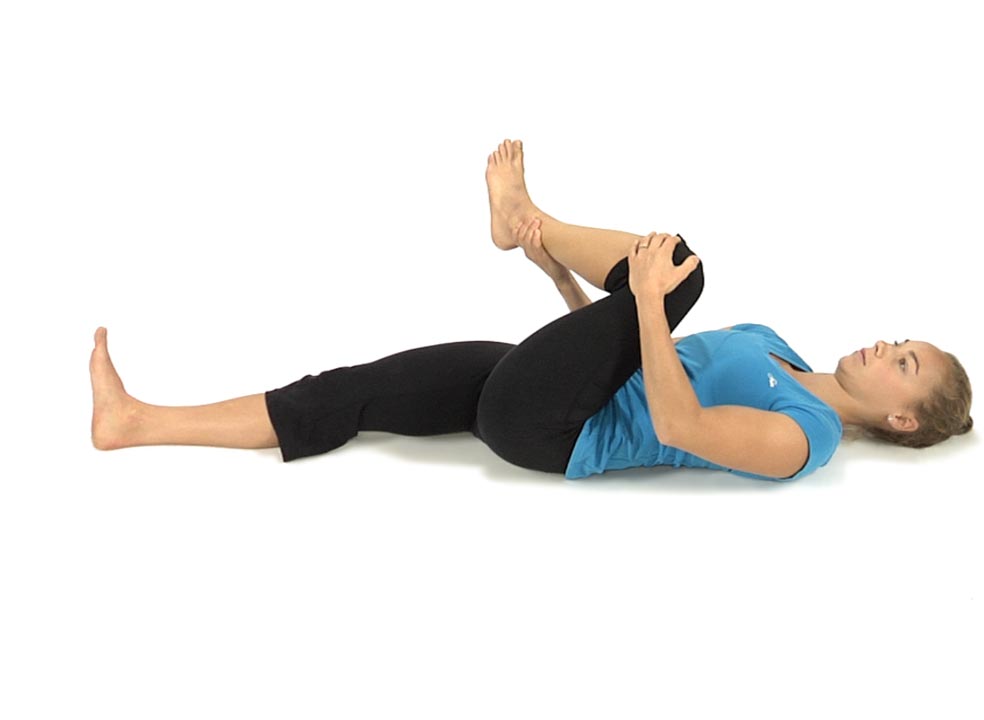
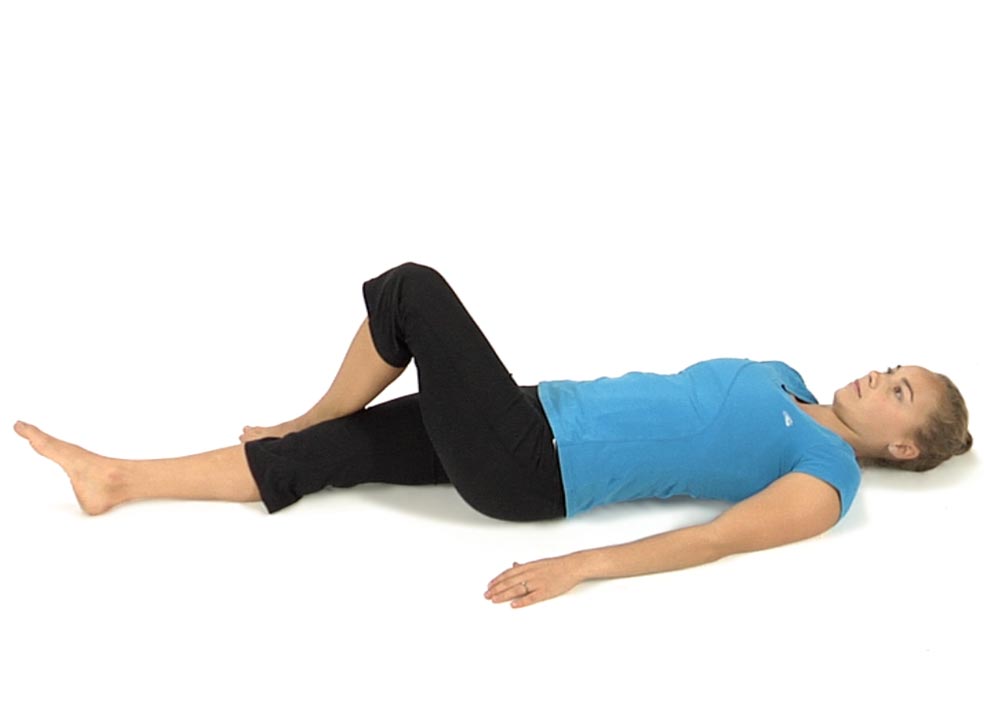
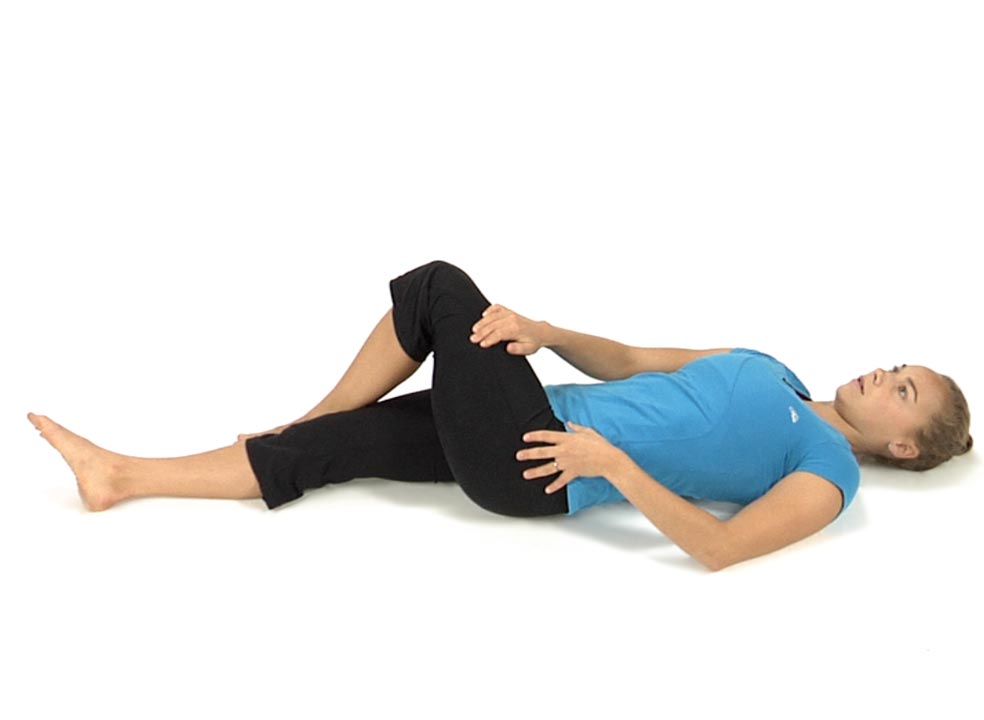
Have the patient reach under the left leg and grasp underneath the ankle with their right hand and under their left knee with the left hand.
Instruct the patient to draw the left and ankle towards their right shoulder using both hands.
A stretch should be felt in the left buttocks.
Then have the patient push their left knee and ankle into both hands for 5-7 seconds, when the patient relaxes have them draw their left leg further up towards the right shoulder.
Have them repeat 3-4 times progressively drawing the left leg further up towards the right shoulder upon each relaxation.
Then have them repeat this exercise on the right side.
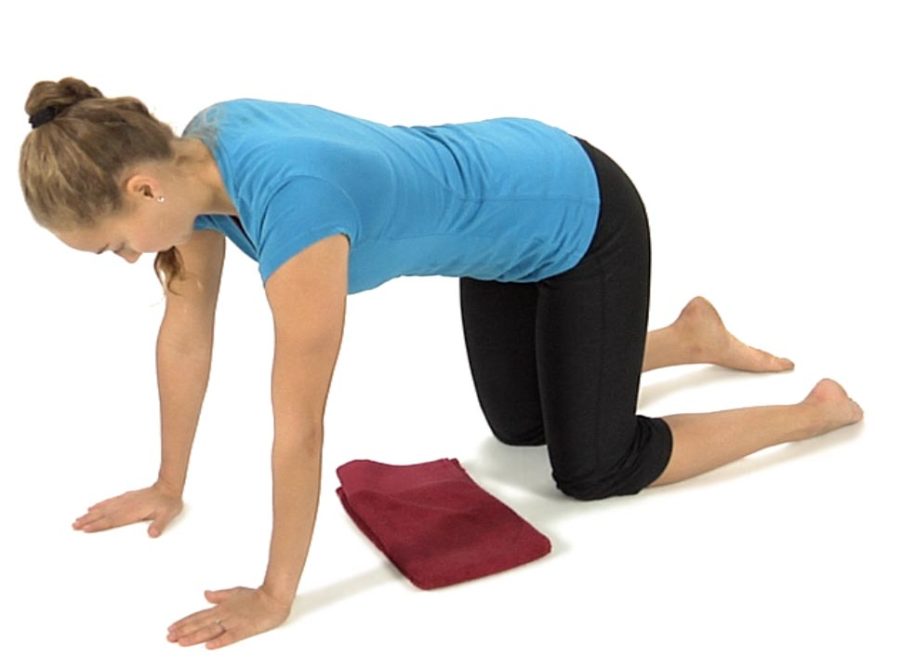
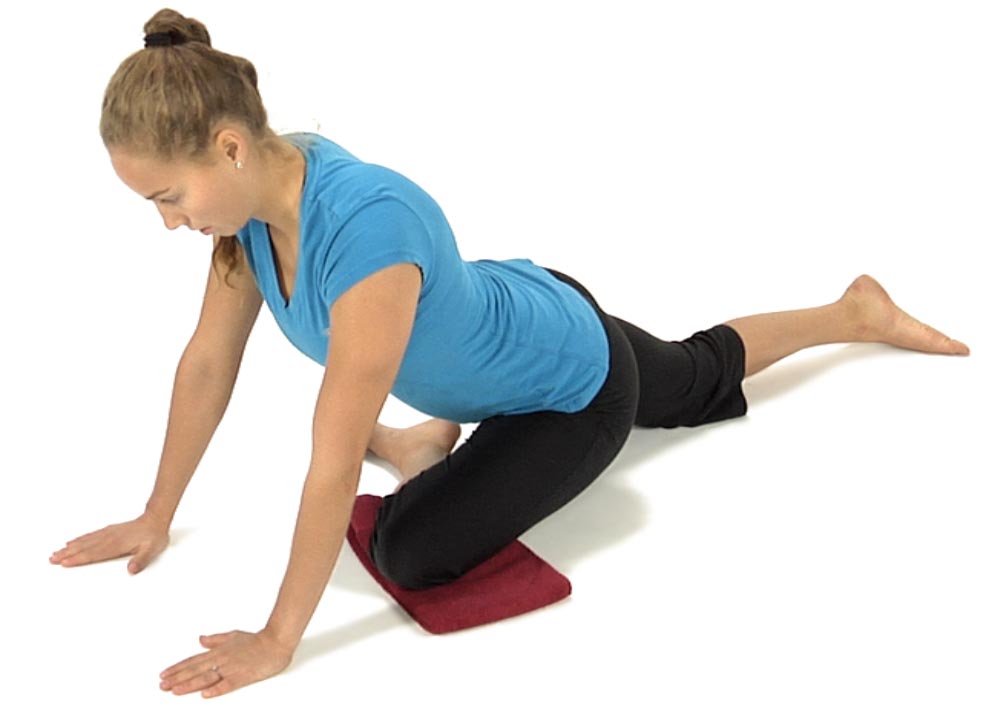
Starting from the hands and knees position, the patient places the left foot across and underneath the trunk so that the arch of the foot is facing the ceiling with the left knee remaining outside of the trunk.
Have the patient stretch out the right leg straight behind them while keeping the pelvis straight.
Instruct the patient to gradually sink down until they feel a stretch in the left buttocks. You can have the patient either stay up with their elbows extended or have them come down to rest on their forearms.
Ask the patient to press their left leg straight down into the table or floor for 5-7 seconds, then relax and stretch further by sliding the right leg further back making sure that they keep the pelvis level.
Repeat a series of contract/relax efforts 3-4 times.
No pain should be felt in the left knee or low back during this exercise.
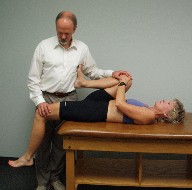
Have the patient place their left foot outside of their right knee and flat on the table.
The patient places their left hand over the left pelvis to stabilize and places the right hand over the lower left thigh, a towel or belt wrapped around the lower left thigh will also work.
Have the patient maintain an active contraction of the right leg to keep it straight.
Instruct the patient to slowly pull the left leg across until a stretch is felt in the left posterior hip area.
From this position a series of contract/relax efforts can be made for 5-7 seconds, progressively stretching into further adduction or the stretch can be maintained for 30 seconds and repeated 2-3 times.