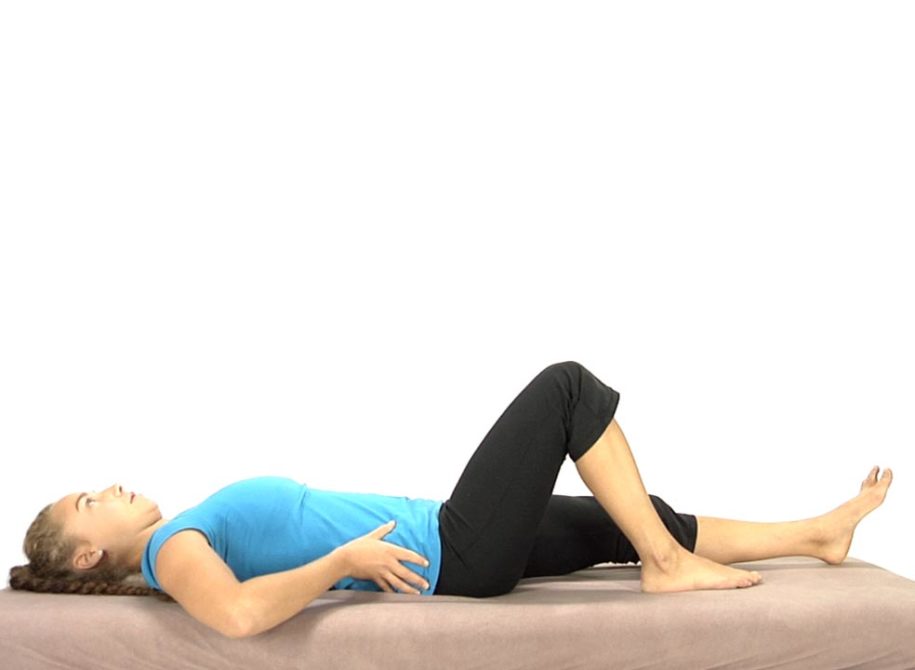
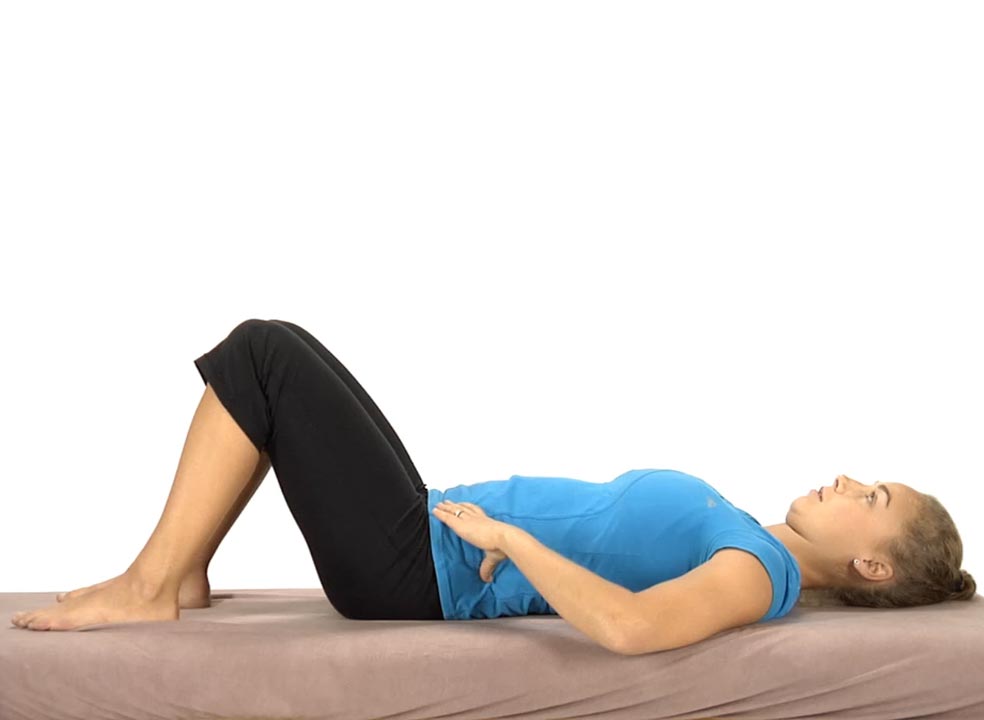
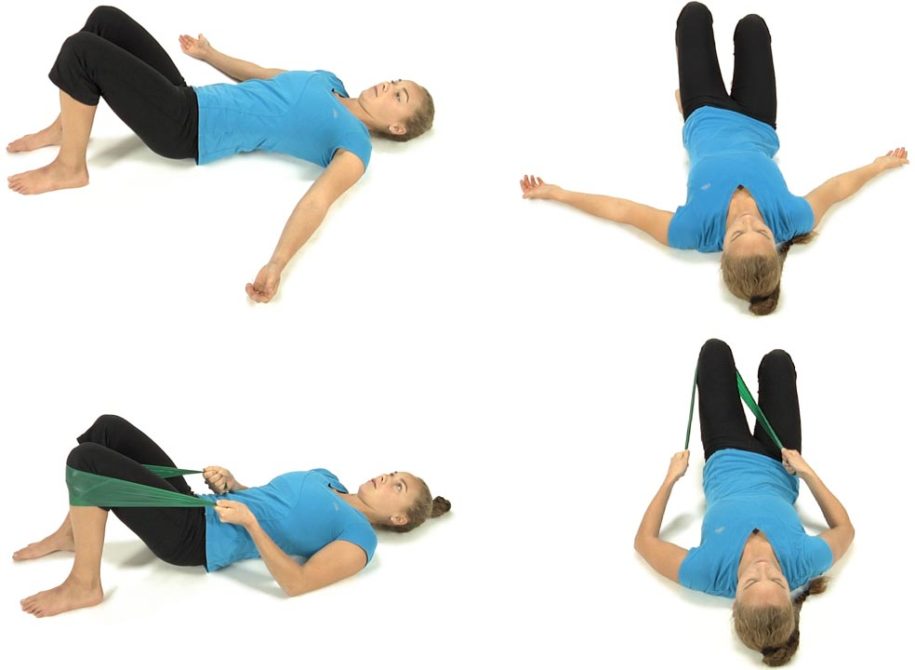
The patient is lying supine with their hips and knees flexed and the feet flat on the table.
Instruct the patient to find a neutral lumbar spine position, midway between 12:00 and 6:00, monitoring the ASISs with their thumbs.
Have the patient draw their belly in without flattening the low back (the ASISs should not move when they draw the belly in).
Instruct the patient to slowly extend their right leg keeping the foot off the table while monitoring the ASISs. The patient tries to touch their heel to the table only after the leg is extended. They then bring the leg back up with the foot remaining off the table. The right ASIS should remain stable as the right leg is extended. If the ASIS moves inferiorly, the patient should stop, and bring the leg back up to the starting position.
Goal – the patient should be able to fully straighten either leg without the ASISs moving and touch their heel to the table while maintaining a neutral lumbar spine.
They repeat the exercise 3-5 times initially and increase repetitions as their performance improves.
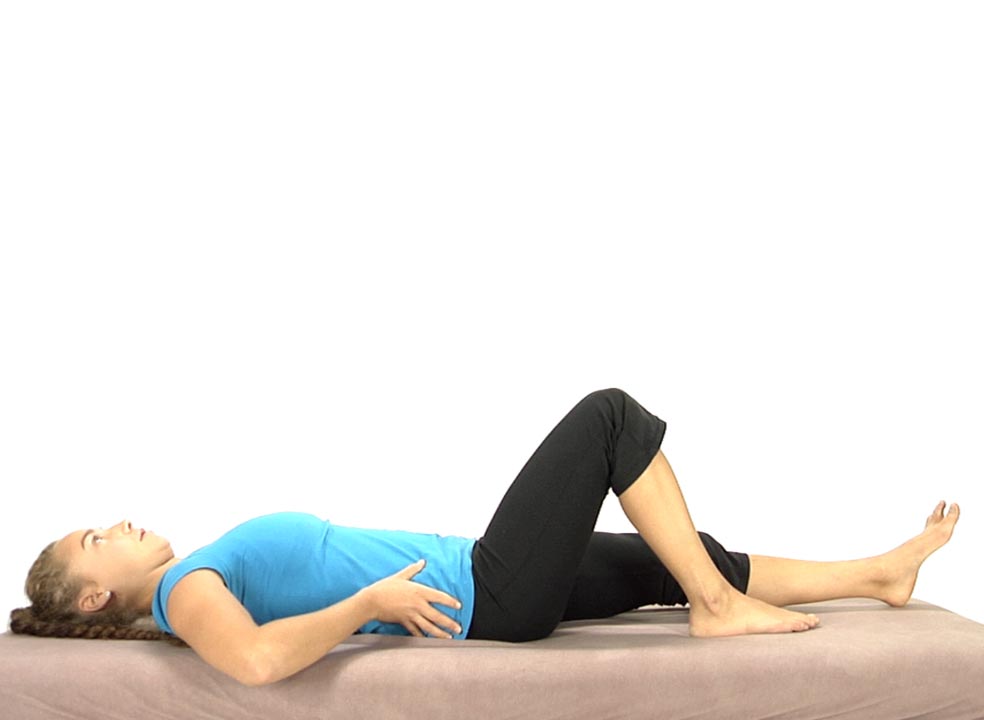
The patient is lying supine with their hips and knees flexed and the feet flat on the table.
Instruct the patient to find a neutral lumbar spine position, midway between 12:00 and 6:00, monitoring the ASISs with their thumbs.
Have the patient draw their belly in without flattening the low back (the ASISs should not move when they draw the belly in).
Instruct the patient to slowly slide their right heel along the table while monitoring the ASISs. The right ASIS should remain stable as the right leg is extended. If the ASIS moves inferiorly, the patient should stop, and bring the leg back up to the starting position.
Goal – the patient should be able to fully straighten either leg without the ASISs moving while maintaining a neutral lumbar spine.
They repeat the exercise 3-5 times initially and increase repetitions as their performance improves.
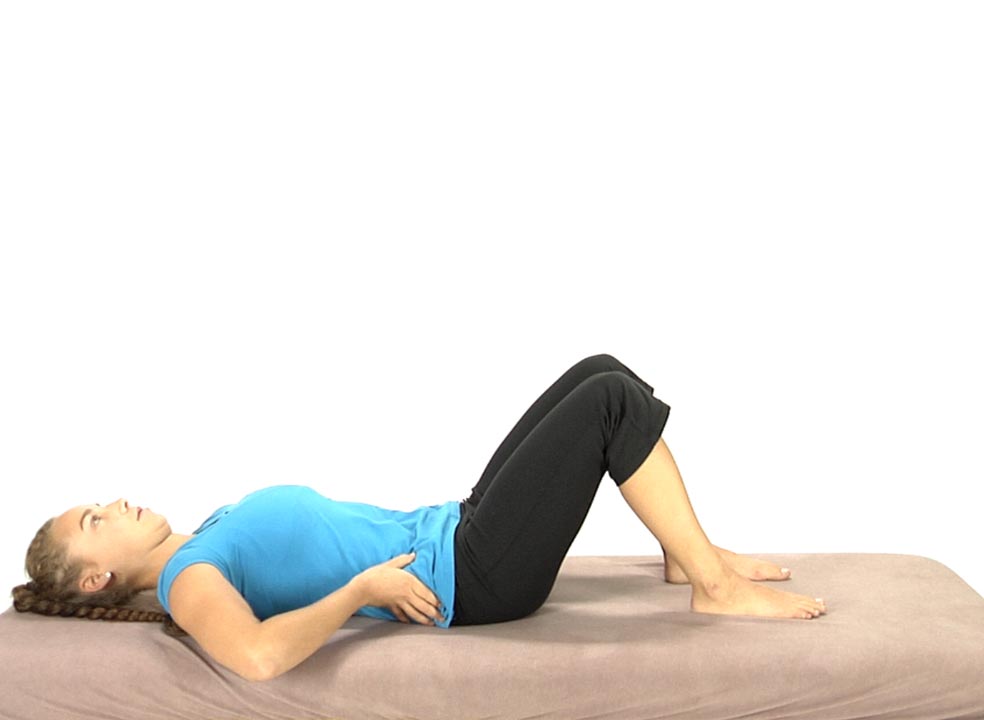
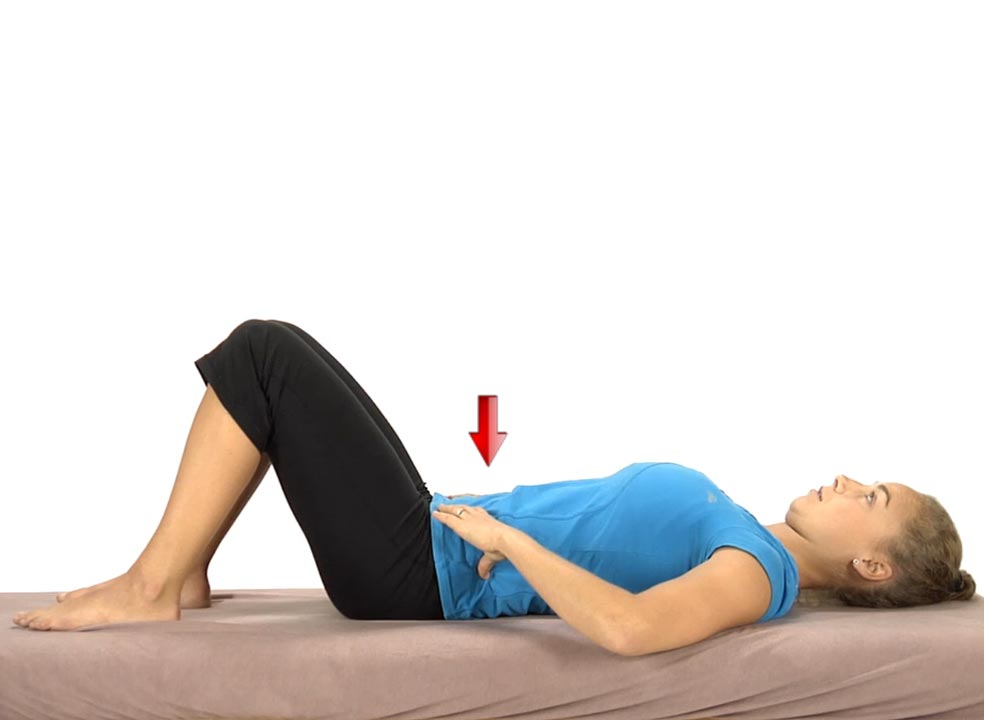
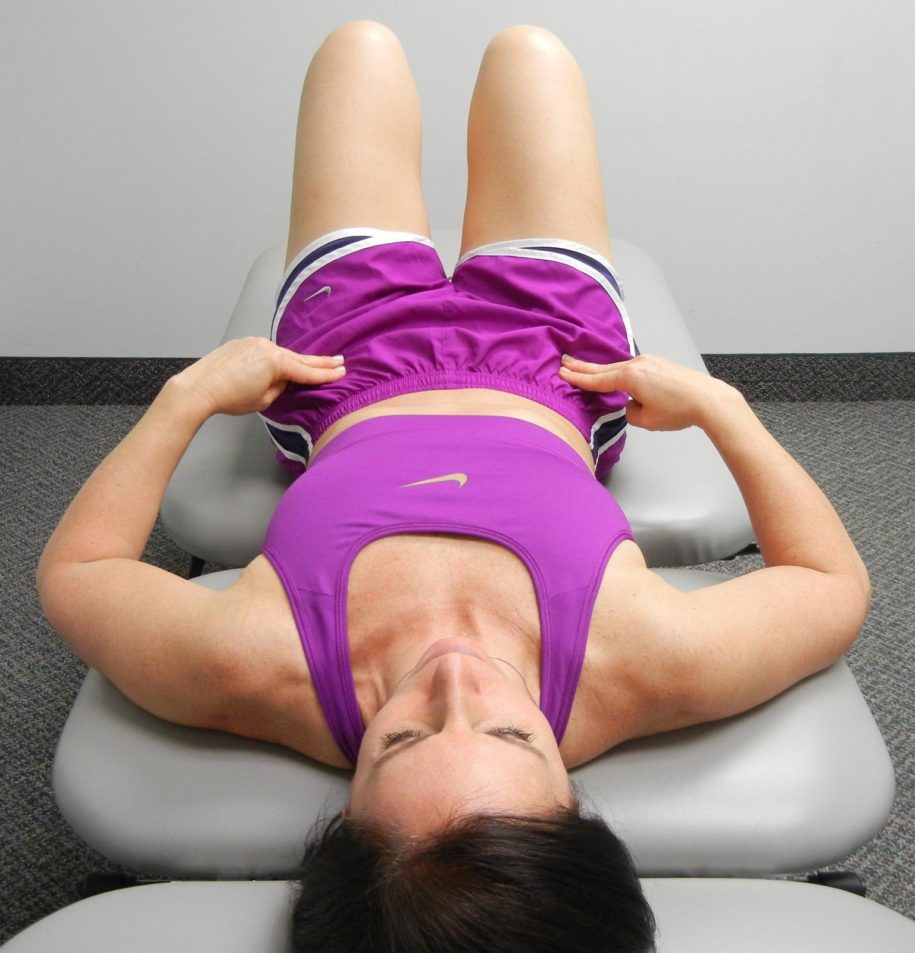
The patient is lying on their back with the hips and knees flexed and feet flat on the table.
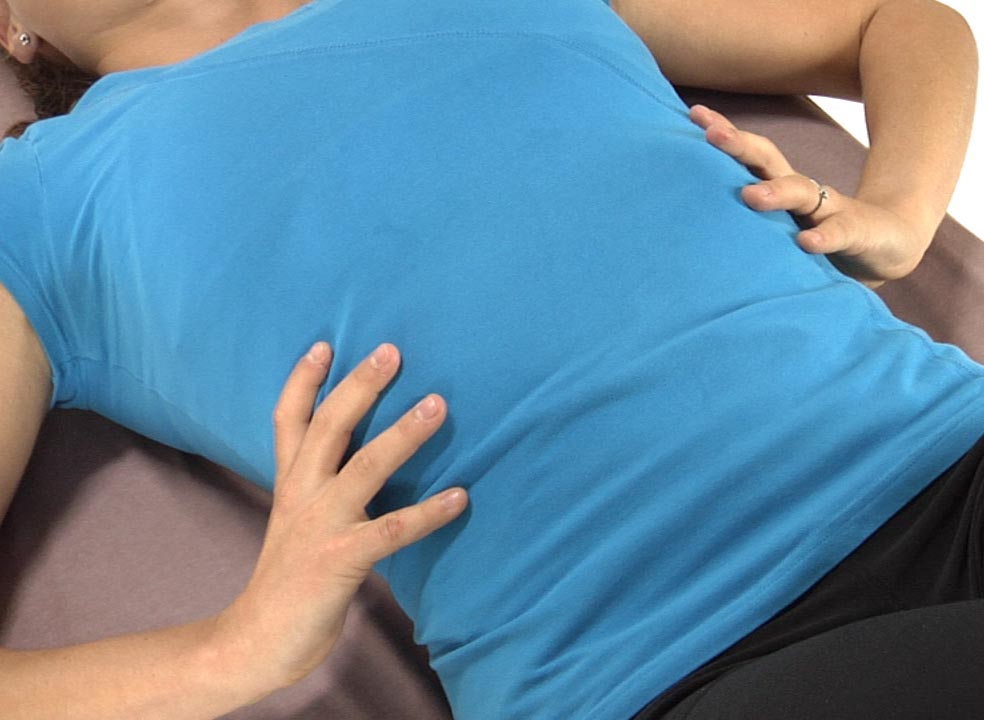
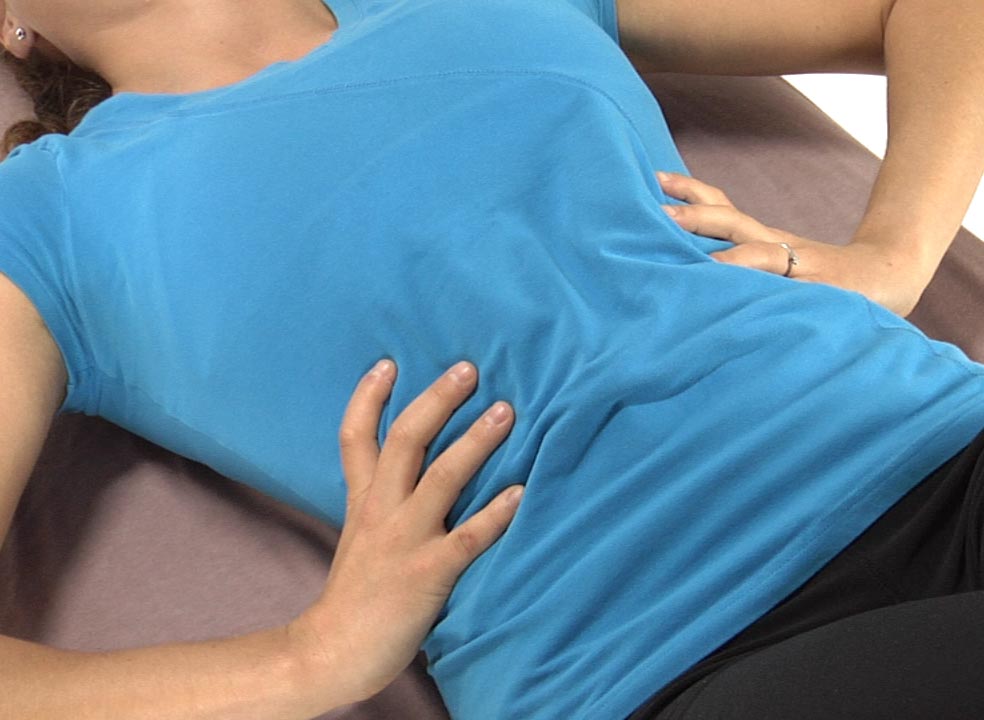
Have the patient place their hands on both sides of the lower rib cage.
Ask the patient to find a neutral lumbar spine by rolling the pelvis towards 6 and 12 o’clock and finding the midpoint in the range.
Instruct the patient to draw the belly in without flattening their lower back maintaining a neutral lumbar spine. The patient monitors the ASISs to make sure that they remain level throughout this exercise.
Instruct the patient to slowly inhale through the nose allowing their lungs to fill with air as the rib cage expands out to the sides as they draw the navel in. Their chest and shoulders should remain relaxed and they should not feel that their belly pushes out or that the lower ribs are pulled down and medially by the obliques which can often substitute with transversus abdominis dysfunction.
The patient exhales through pursed lips and allows the ribs to fall down and in. Their upper chest should continue to remain relaxed.
If they are having difficulty recruiting the transversus have them blow out as much air as possible during exhalation using their abdominal muscles to assist and hold for 3-5 seconds. Then have them slowly inhale while continuing to draw the belly in and hold for 10 seconds.
Have them repeat up to 10 times holding for 10 seconds each time.
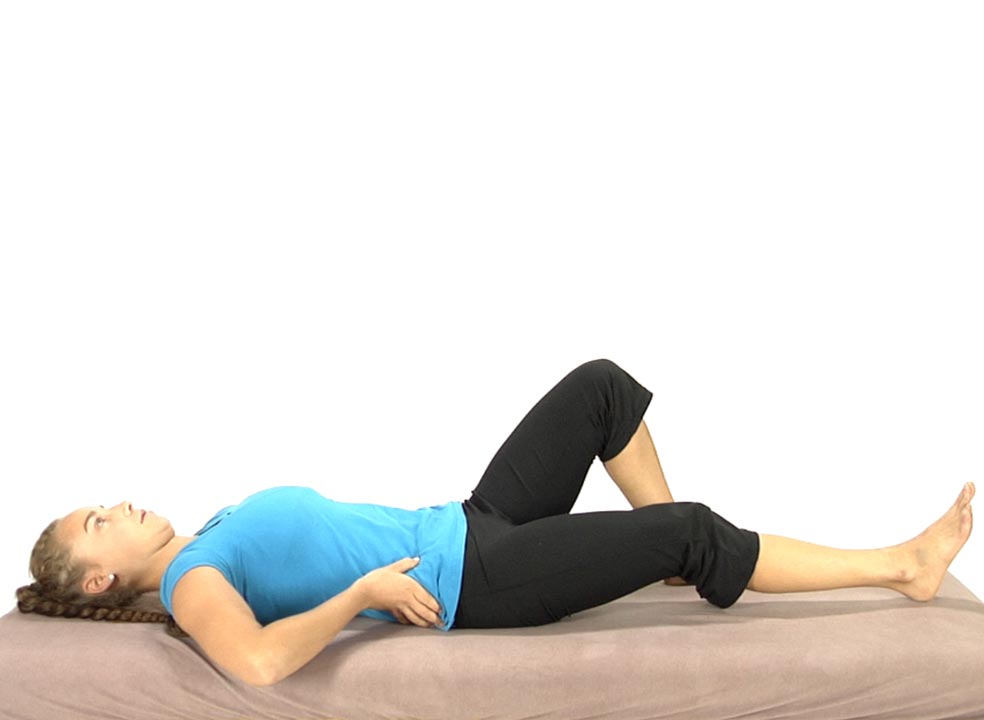
The patient is lying on their back with the hips and knees flexed and feet flat on the table.
Have the patient place their hands on both sides of the lower rib cage.
Instruct the patient to slowly inhale through the nose allowing their lungs to fill with air as the rib cage expands out to the sides as they draw the navel in. Their chest and shoulders should remain relaxed and they should not feel that their belly pushes out or that the lower ribs are pulled down and medially by the obliques which can often substitute for transversus dysfunction.
The patient exhales through pursed lips and allows the ribs to fall down and in. Their upper chest should continue to remain relaxed.
Have them repeat up to 10 times holding for 10 seconds each time.
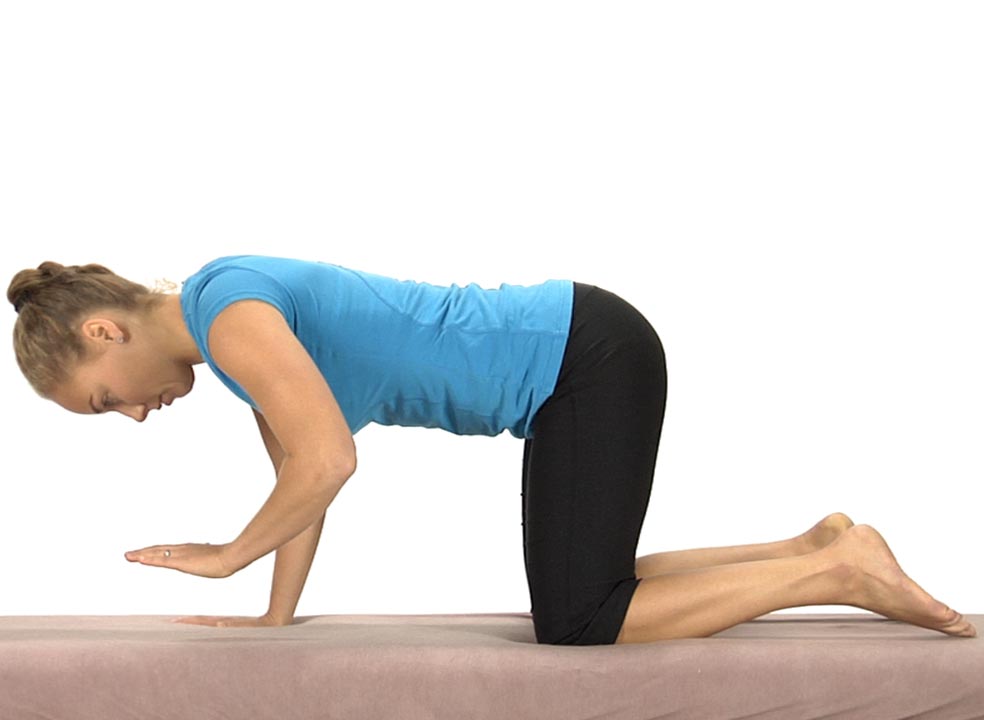
Starting in hands and knees with the hips positioned directly over the knees and the shoulders positioned directly over the hands, the patient is instructed to bend their elbows so that the shoulders are the same height as the hips.
The patient is instructed to find a neutral lumbar spine by rocking the pelvis from 12:00 to 6:00 and finding the midrange position.
The therapist monitors the PSISs to insure that they are level in the frontal plane before starting and during the performance of this exercise.
Instruct the patient to draw the belly up and in towards the spine without changing the lumbar neutral position. The therapist monitors the PSISs to insure that they remain stable and provides verbal feedback to the patient if any deviation should occur. The therapist should watch for any loss of the neutral lumbar spine position during the exercise.
Ask the patient to lift the left hand off the table and maintain a level pelvis and shoulder girdles.
Make sure the patient keeps their right elbow bent, shoulders level and they don’t drop their head when they lift their left hand.
Then have the patient switch sides lifting up the right hand.
The patient is instructed to hold for 10 seconds on each side as one repetition and repeat 3-5 times, gradually working up to 10 reps.
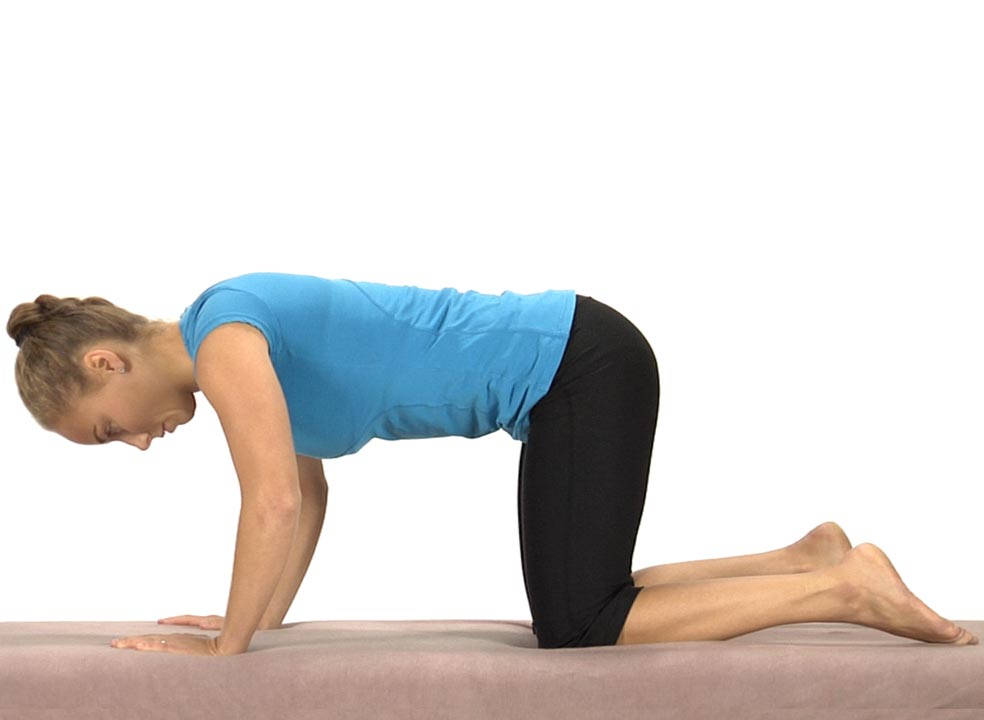
Starting in hands and knees with the hips positioned directly over the knees and the shoulders positioned directly over the hands, the patient is instructed to bend their elbows so that the shoulders are the same height as the hips.
The patient is instructed to find a neutral lumbar spine by rocking the pelvis from 12:00 to 6:00 and finding the midrange position.
The therapist monitors the PSISs to insure that they are level in the frontal plane before starting and during the performance of this exercise.
Instruct the patient to draw the belly up and in towards the spine without changing the lumbar neutral position. The therapist monitors the PSISs to insure that they remain stable and provides verbal feedback to the patient if any deviation should occur. The therapist should watch for any loss of the neutral lumbar spine position during the exercise.
The patient is instructed to hold for 10 seconds and repeat 3-5 times.
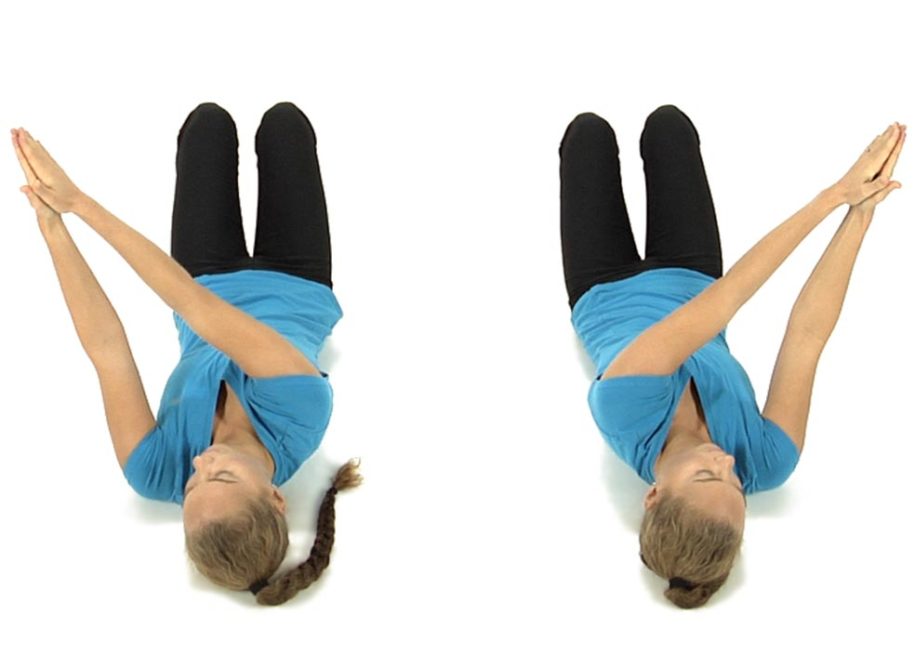
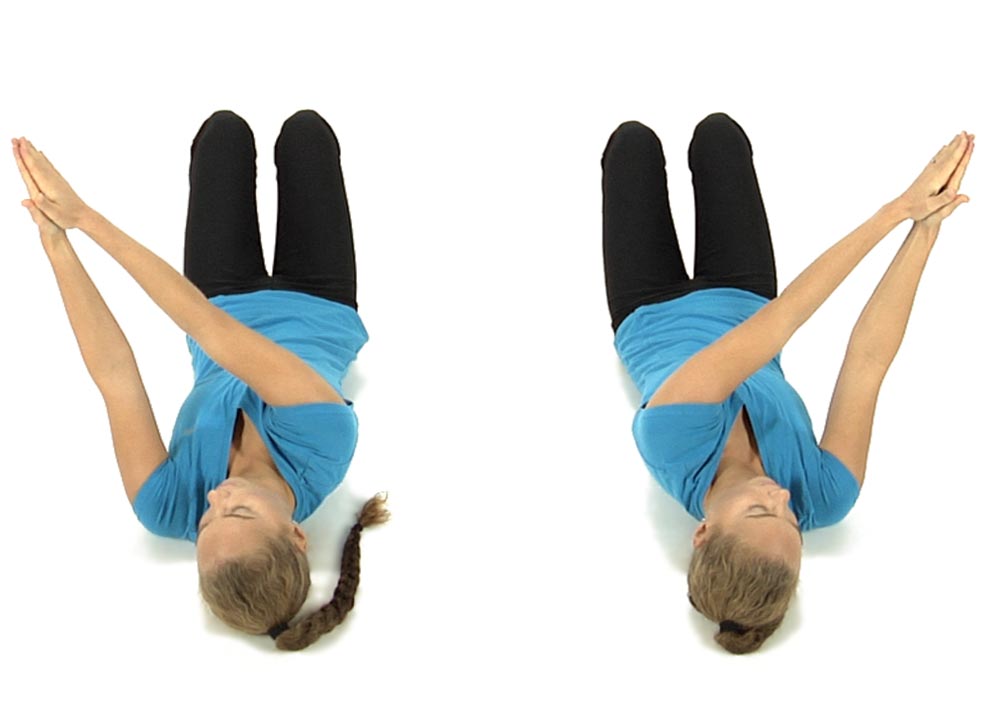
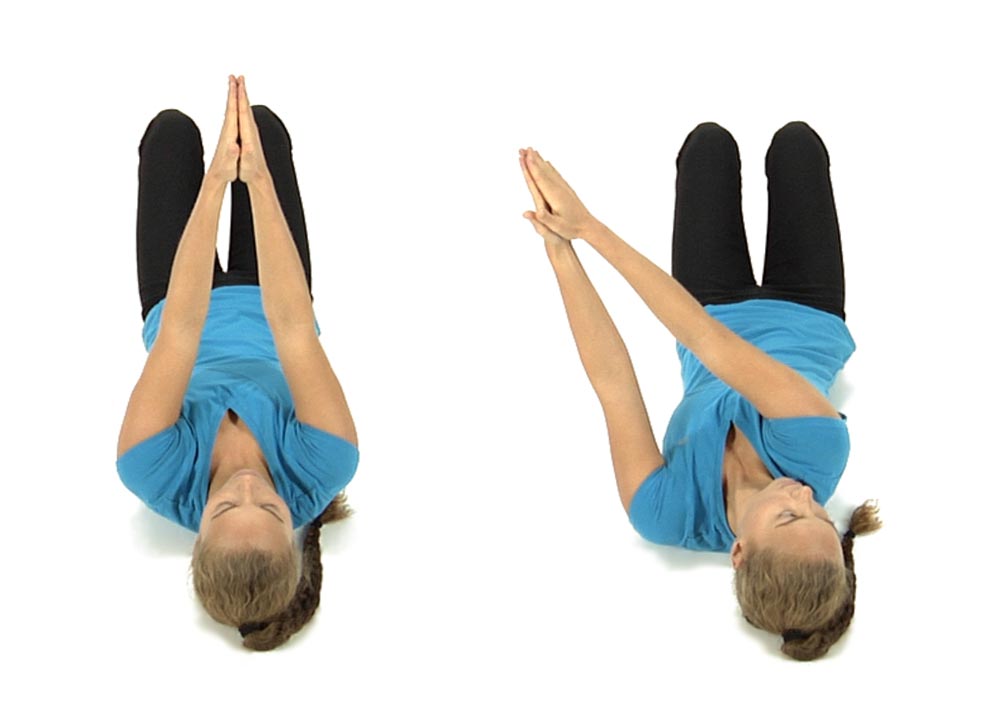
The patient is lying on their back with both knees bent up and the feet flat on the floor with their arms straight out in front and with palms together.
Instruct the patient to take their arms to the right and turn their head to the right as far as they can comfortably, then repeat to the left side to determine which side is easier to do.
Then if they found it was easier to turn to the right side, have them take their arms to the right while they turn their head to the left as far as they can comfortably and without straining, then have them bring the head and arms back to the midline starting position and repeat 5 times, rotating their head and arms in opposite directions.
Then ask them to recheck their ability to turn to the right while looking to the right and see if it’s even easier than before.
Then repeat these movements going the opposite way with their arms going to the left as they turn the head to the right, repeat 5 times, then they stop and recheck their ability to bring their arms to the left as they look to the left.
They patient is instructed to finish by bringing their arms to the right as they look to the right and arms to the left as they look to the left, back and forth 5 times each way.
Then have the patient recheck their ability to rotate the pelvis towards 3 and 9 o’clock to see if it’s easier to perform.
Unilateral bridging on the left side to re-educate 9 o’clock control:
The patient is lying flat on their back with their left knee bent and the left foot flat on the floor with their arms resting on the floor at the sides.
Instruct the patient to imagine that there is a string attached to their left knee that is pulling the knee forward over their left big toe as they slowly lift their left hip, then pelvis and finally the spine off the floor shifting their weight onto the right buttocks.
The patient should not lift any further than is comfortable while keeping their shoulders flat on the floor.
Then instruct the patient to slowly lower back to the floor initiating the movement from above down, first touching the middle back, then the lower back, then the pelvis and finally the hip to the floor.
Have them repeat this exercise slowly 6-8 times trying to get them to feel that their hip, pelvis and spine can move independently from each other rather than as a block.
Have them repeat the exercise on the right side to re-educate 3 o’clock control. Instruct the patient to always start with the easiest side first
Retraining Exercise to Restore Symmetrical 12 to 6 o’clock
Patient is positioned supine with hips and knees flexed and feet hip width apart.
The patient palpates the ASISs with their fingers or thumbs to assess for symmetry of the ASISs in the frontal plane before they initiate movement. The therapist observes the ASISs and gives the patient verbal cues if needed to level the ASISs before movement is initiated. The most common initial instruction to the patient is to bring the R ASIS up superiorly in order for the ASISs to start from a position of symmetry before movement begins.
The patient is then instructed to inhale as they roll the pelvis down towards 6 o’clock attempting to keep the ASISs level by continuing to monitor with their fingers. If during the initial movement assessment it was found that the R ASIS moved farther inferiorly than the L ASIS the therapist instructs the patient to focus on pushing the L ASIS a little further inferiorly to keep the ASISs level in the frontal plane.
The patient is then instructed to exhale and roll the pelvis up towards 12 o’clock while still maintaining contact at the ASISs. If during the initial movement assessment it was found that the L ASIS moved farther superiorly than the R ASIS, the therapist instructs the patient to focus on drawing the R ASIS up further superiorly in order to keep the ASISs level. The patient repeats the movements toward 6 and 12 o’clock 6 to 8 times trying to maintain symmetry by continuing to monitor at the ASISs and making any adjustments as needed.
The goal is for the patient to be able to roll the pelvis towards 6 and 12 o’clock with symmetry of the ASISs maintained throughout the full range of motion and eventually without the patient having “to think” about maintaining this symmetry.
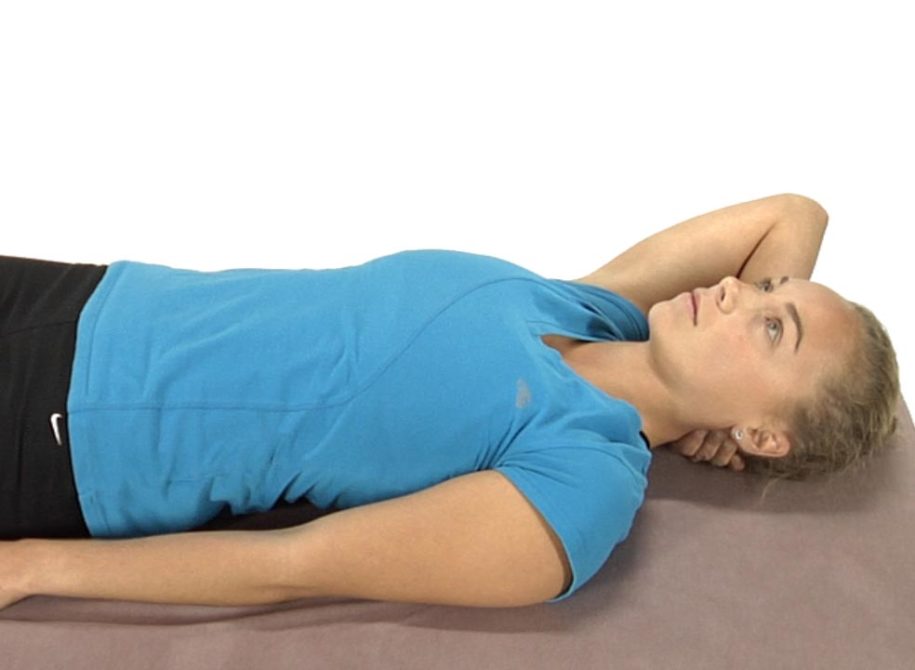
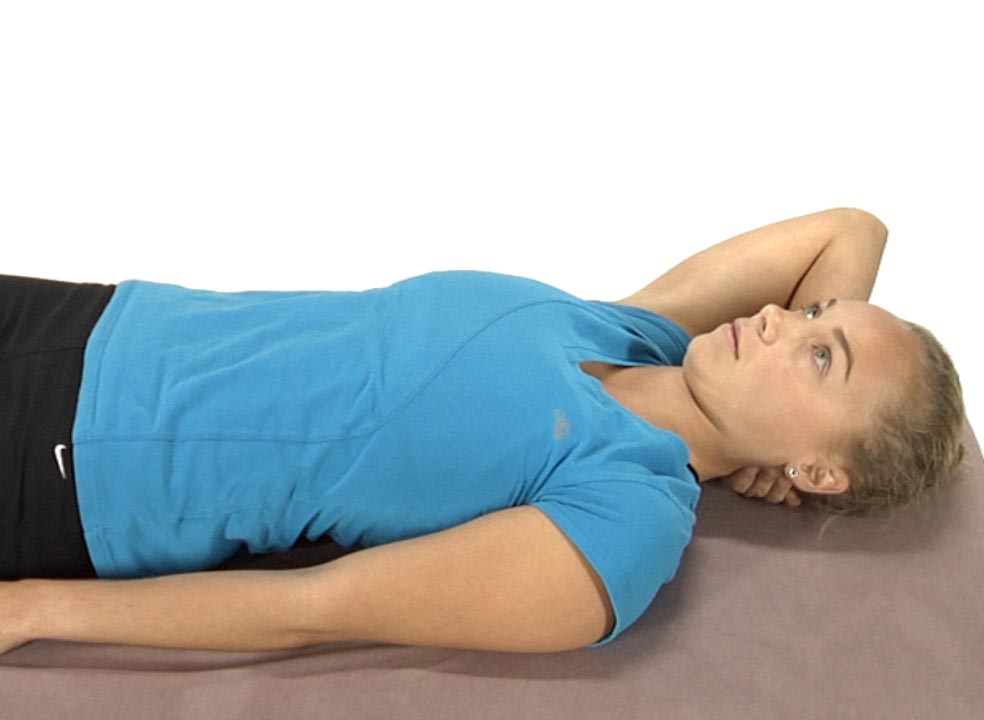
The patient is lying on their back and places one hand under the upper part of the neck, at the base of the skull.
Ask the patient to attempt to nod the chin down slightly, increasing the pressure against the hand under the upper neck. Instruct the patient to avoid pushing their head back toward the table.
There should not be any palpable tension in the superficial muscles in the front of the neck as they perform the exercise.
The patient is instructed to hold for 10 seconds and repeat 3-5 times, gradually working up to 10 repetitions.