Anterior Innominate Self Correction: Home Self-Mobilizing Exercise
Anterior Innominate Self Correction
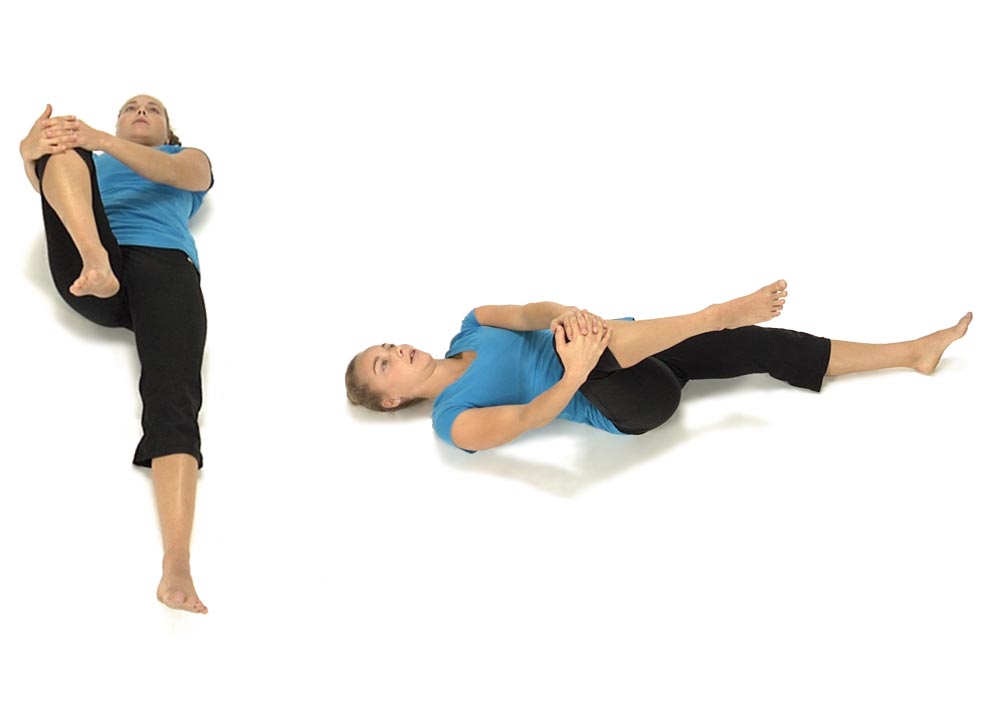
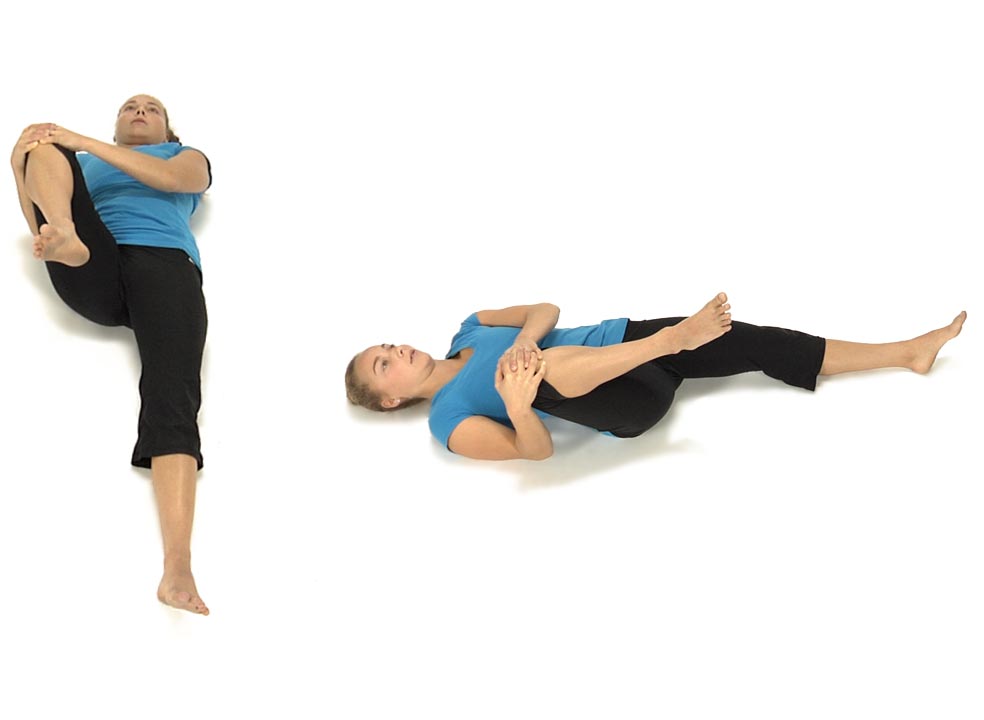
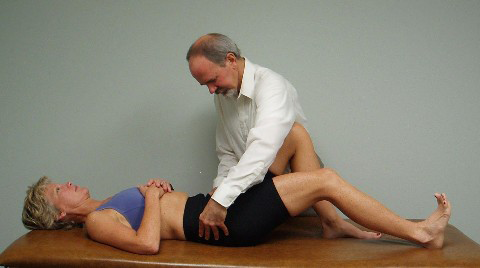
To correct an Anterior Innominate on the right:
The patient is lying on their back keeping the left leg out straight. Using both hands they bring their R knee up towards their chest then out towards their right shoulder.
Instruct the patient to hold the right leg firmly and do not allow the leg to move as they attempt to straighten the right hip. They hold the contraction for 4-5 seconds.
When they relax instruct the patient to bring the right leg further up and out towards the R shoulder and repeat 3 to 4 times.
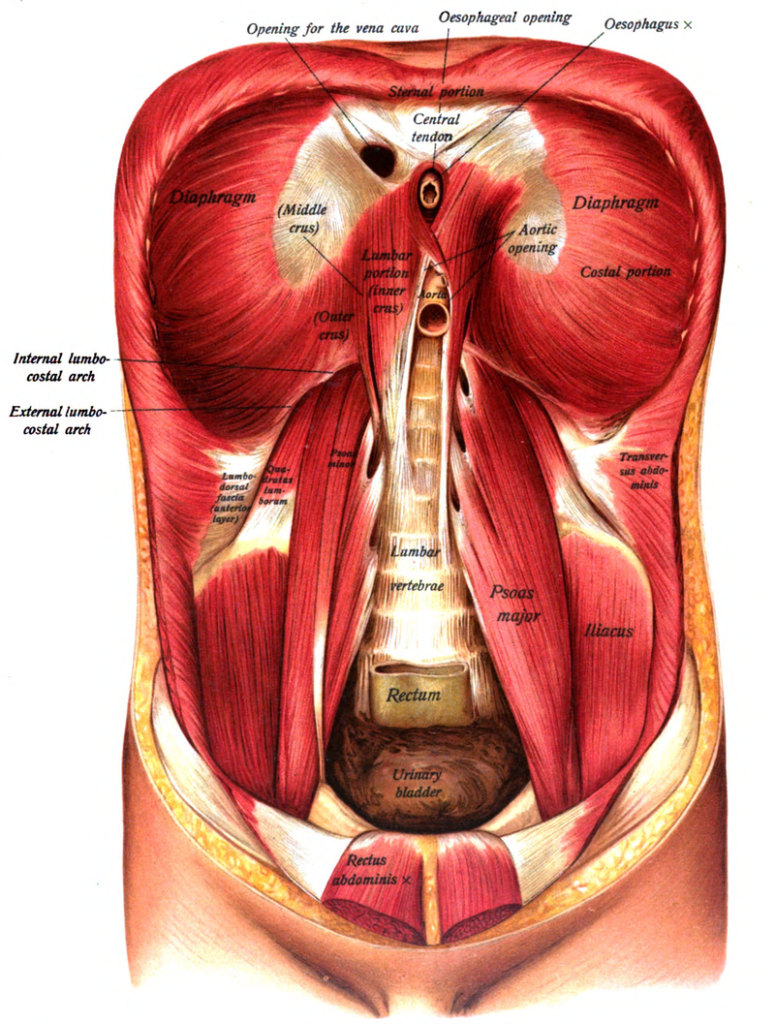
Psoas attaches to the transverse processes and vertebral bodies from T12 to L5 Iliacus attaches to the iliac fossa and sometimes anterior sacral base Powerful hip flexor and slight ER of the hip, side bends the LS to the same side and rotates away, when hypertonic these muscles limit hip extension Innervation: Femoral nerve – L2, 3 and 4
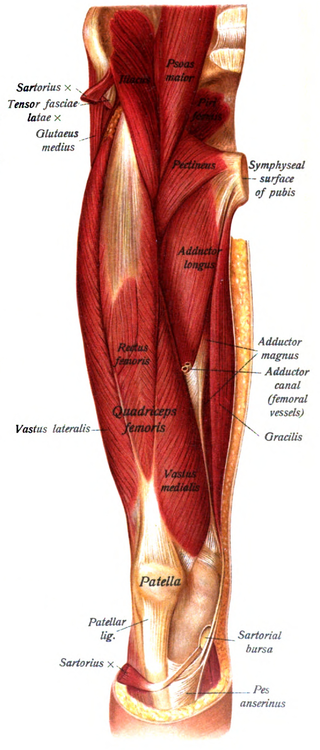
Tensor Fascia Latae:
Attached at the anterior iliac crest and ASIS Inserts into the IT band Flexes, abducts and internally rotates the hip, externally rotates the knee Innervation –Superior gluteal n. L4,5 and S1
Rectus Femoris:
Attached to the AIIS and the anterior hip capsule Flexes the hip and extends the knee Pain in the front of the knee cap is often a sign of a tight rectus femoris Innervation – femoral n. L2, 3, and 4
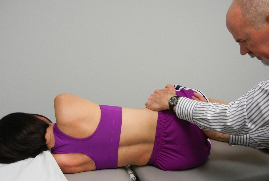
Patient is lying on their left side with their shoulders and hips square on the table and their hips flexed to 60 degrees with their lumbar spine in neutral.
You ask the patient to imagine a clock resting on top of their right hip so that 12 is closest to the shoulder and 6 closest to their feet, 3 is in front and 9 is towards the back.
You tell the patient that we are going to work from 1-2 o’clock (anterior elevation) down to 7-8 o’clock (posterior depression).
Start first by asking the patient to isometrically hold various positions along the diagonal from 1-2 down to 7-8 o’clock then work eccentrically giving you resistance as you pull down towards 7-8 or push up towards 1-2. You finish by asking the patient to pull the hip up towards 1-2 or push down and back towards 7-8 against your resistance.
The patient must avoid activating the right shoulder and right side of the neck during this activity and avoid moving out of the neutral position in their low back.
Manual Therapy for Restricted 9 o’clock – restricted pelvic rotation to the R and/or restricted sacral anterior nutation on the L
Treated as above except the patient is lying on their R side working through the pelvis from 10-11 o’clock (anterior elevation) down to 4-5 o’clock (posterior depression).
Instruct the patient to place one foot directly in front of the other (heel to toe), done first with eyes open and then with eyes closed. Then walk backwards place one foot directly behind the other (toe to heel), done first with eyes open and then with eyes closed.
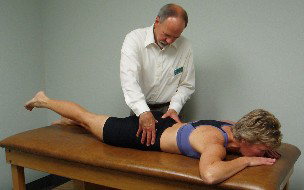
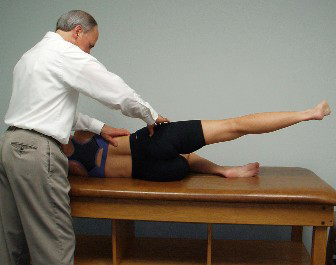
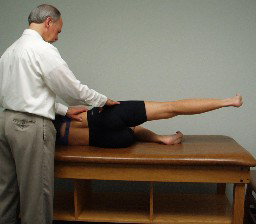
Step 1: The patient is lying prone and the examiner palpates the gluteus maximus for activation during hip extension. Janda originally described an ideal hip extension firing pattern in which the hamstrings fired first followed by the gluteus maximus then the contralateral and finally ipsilateral lumbar erector spinae. (Janda, 1990). Subsequent studies have not supported this firing pattern. (Pierce and Lee, 1990; Vogt and Banzer, 1997). Clinically what seems to be most important is whether or not the gluteus maximus fires at all and how well are the pelvis and trunk stabilized during hip extension.
Step 2: The second part of the hip extension test is for the examiner to monitor the PSISs during active hip extension. Normally the PSISs should stay still or move slightly superior during the movement.
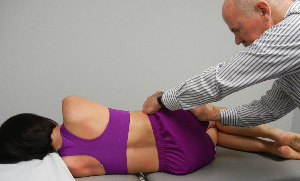
The patient is side lying with the bottom leg flexed for stability. A pillow is placed under the head for support. The top leg is in alignment with the trunk. The examiner palpates the TFL and posterior gluteus medius with his or her right hand and the lateral portion of the quadratus lumborum with the left fingers. The patient is asked to raise the leg toward the ceiling. The examiner palpates for activation of the gluteus medius.
We can add elongation with hip abduction and/or hip external rotation to facilitate the posterior gluteus medius and reassess gluteus medius activation/tone.
An observational active side-lying hip abduction test while having both legs extended to assess for frontal plane stability has shown promise in predicting who is most likely to develop low back pain from prolonged standing (Nelson-Wong, 2009). A subsequent study has found this test to be a reliable observational tool (Davis et al. 2011).
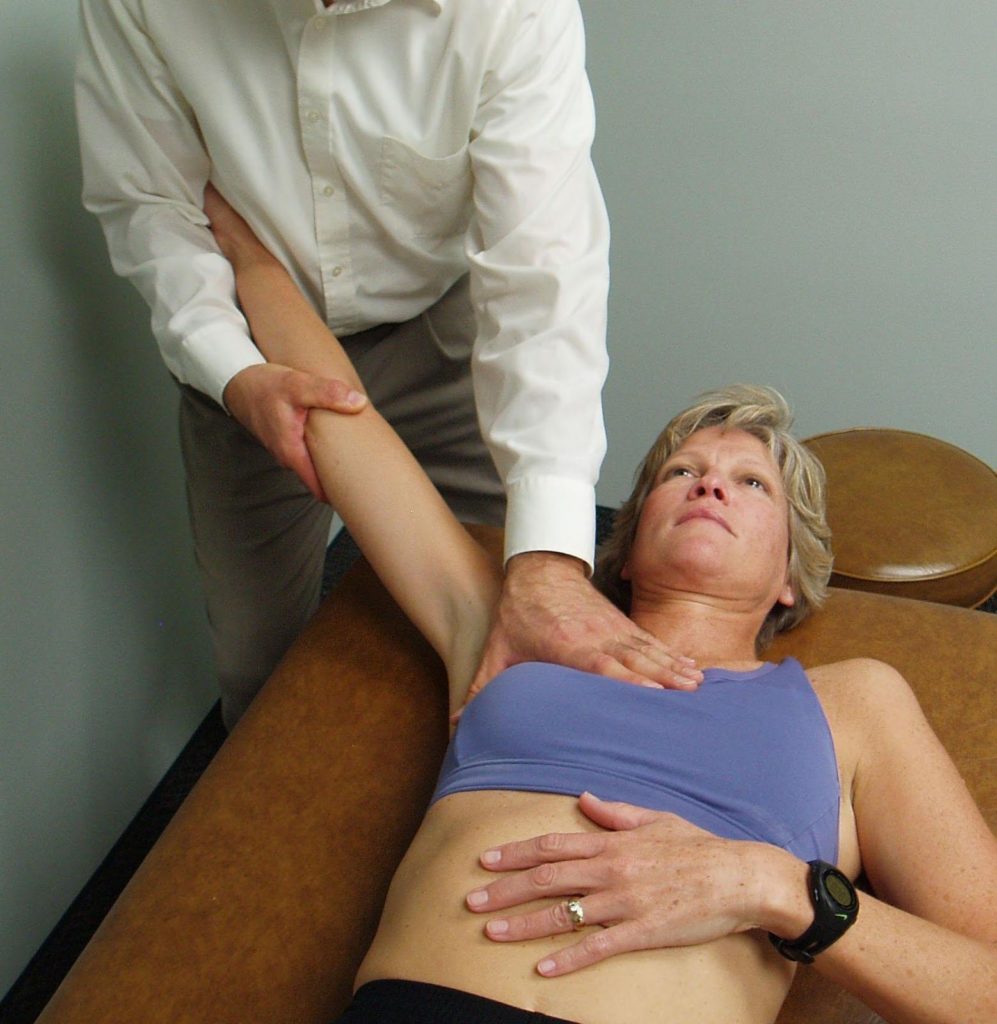
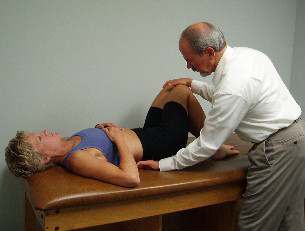
The patient is in the standard supine position with arms resting on the stomach. The knees are dropped to the left to allow the examiner to place the palpating fingers of the left hand on the right side of the subject’s spine. The palpating fingers are in the spinal gutter medial to the erector spinae muscles. The examiner localizes the rotation to his/her palpating fingers and asks the patient to contract or press back into the fingers at each segmental level of the spine examining from approximately T12 to L5. This tests the ability of the subject to contract the multifidi on the right side of the spine which should contract to assist in rotating the spine back to the left.
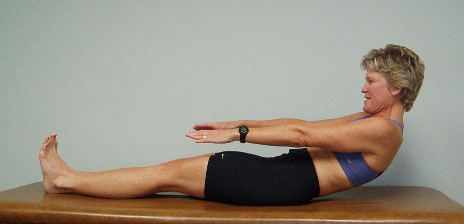
The patient is lying flat on their back with the legs out straight and is instructed to slowly curl up as far as they can, reaching with the fingers towards the toes. The examiner watches to make sure the patient slowly curls up at each segmental level and does not momentarily extend the spine during the movement.
Patient holds 12 O’Clock and examiner monitor ASISs
The patient starts in the same position and is asked to roll the pelvis up towards 12 o’clock. The examiner monitors the ASISs for symmetry at the 12 o’clock position. The ASISs must start level before asking for the test movement. While the patient is holding symmetry at 12 o’clock they are asked to slide one heel down along the table as far as possible without losing the 12 o’clock positon. The examiner monitors the ASISs making sure that neither ASIS moves caudally as the leg is extended.